Integration with Brevo | Email Marketing Software, Automation & CRM
Brevo offers a powerful all-in-one platform for email marketing, marketing automation, and CRM to help businesses engage with their customers, boost conversions, and optimize marketing efforts. By integrating with Brevo, businesses can seamlessly manage their email campaigns, create personalized customer journeys, and automate repetitive tasks, all within a single, easy-to-use platform.
- Sign Up for a Brevo Account:
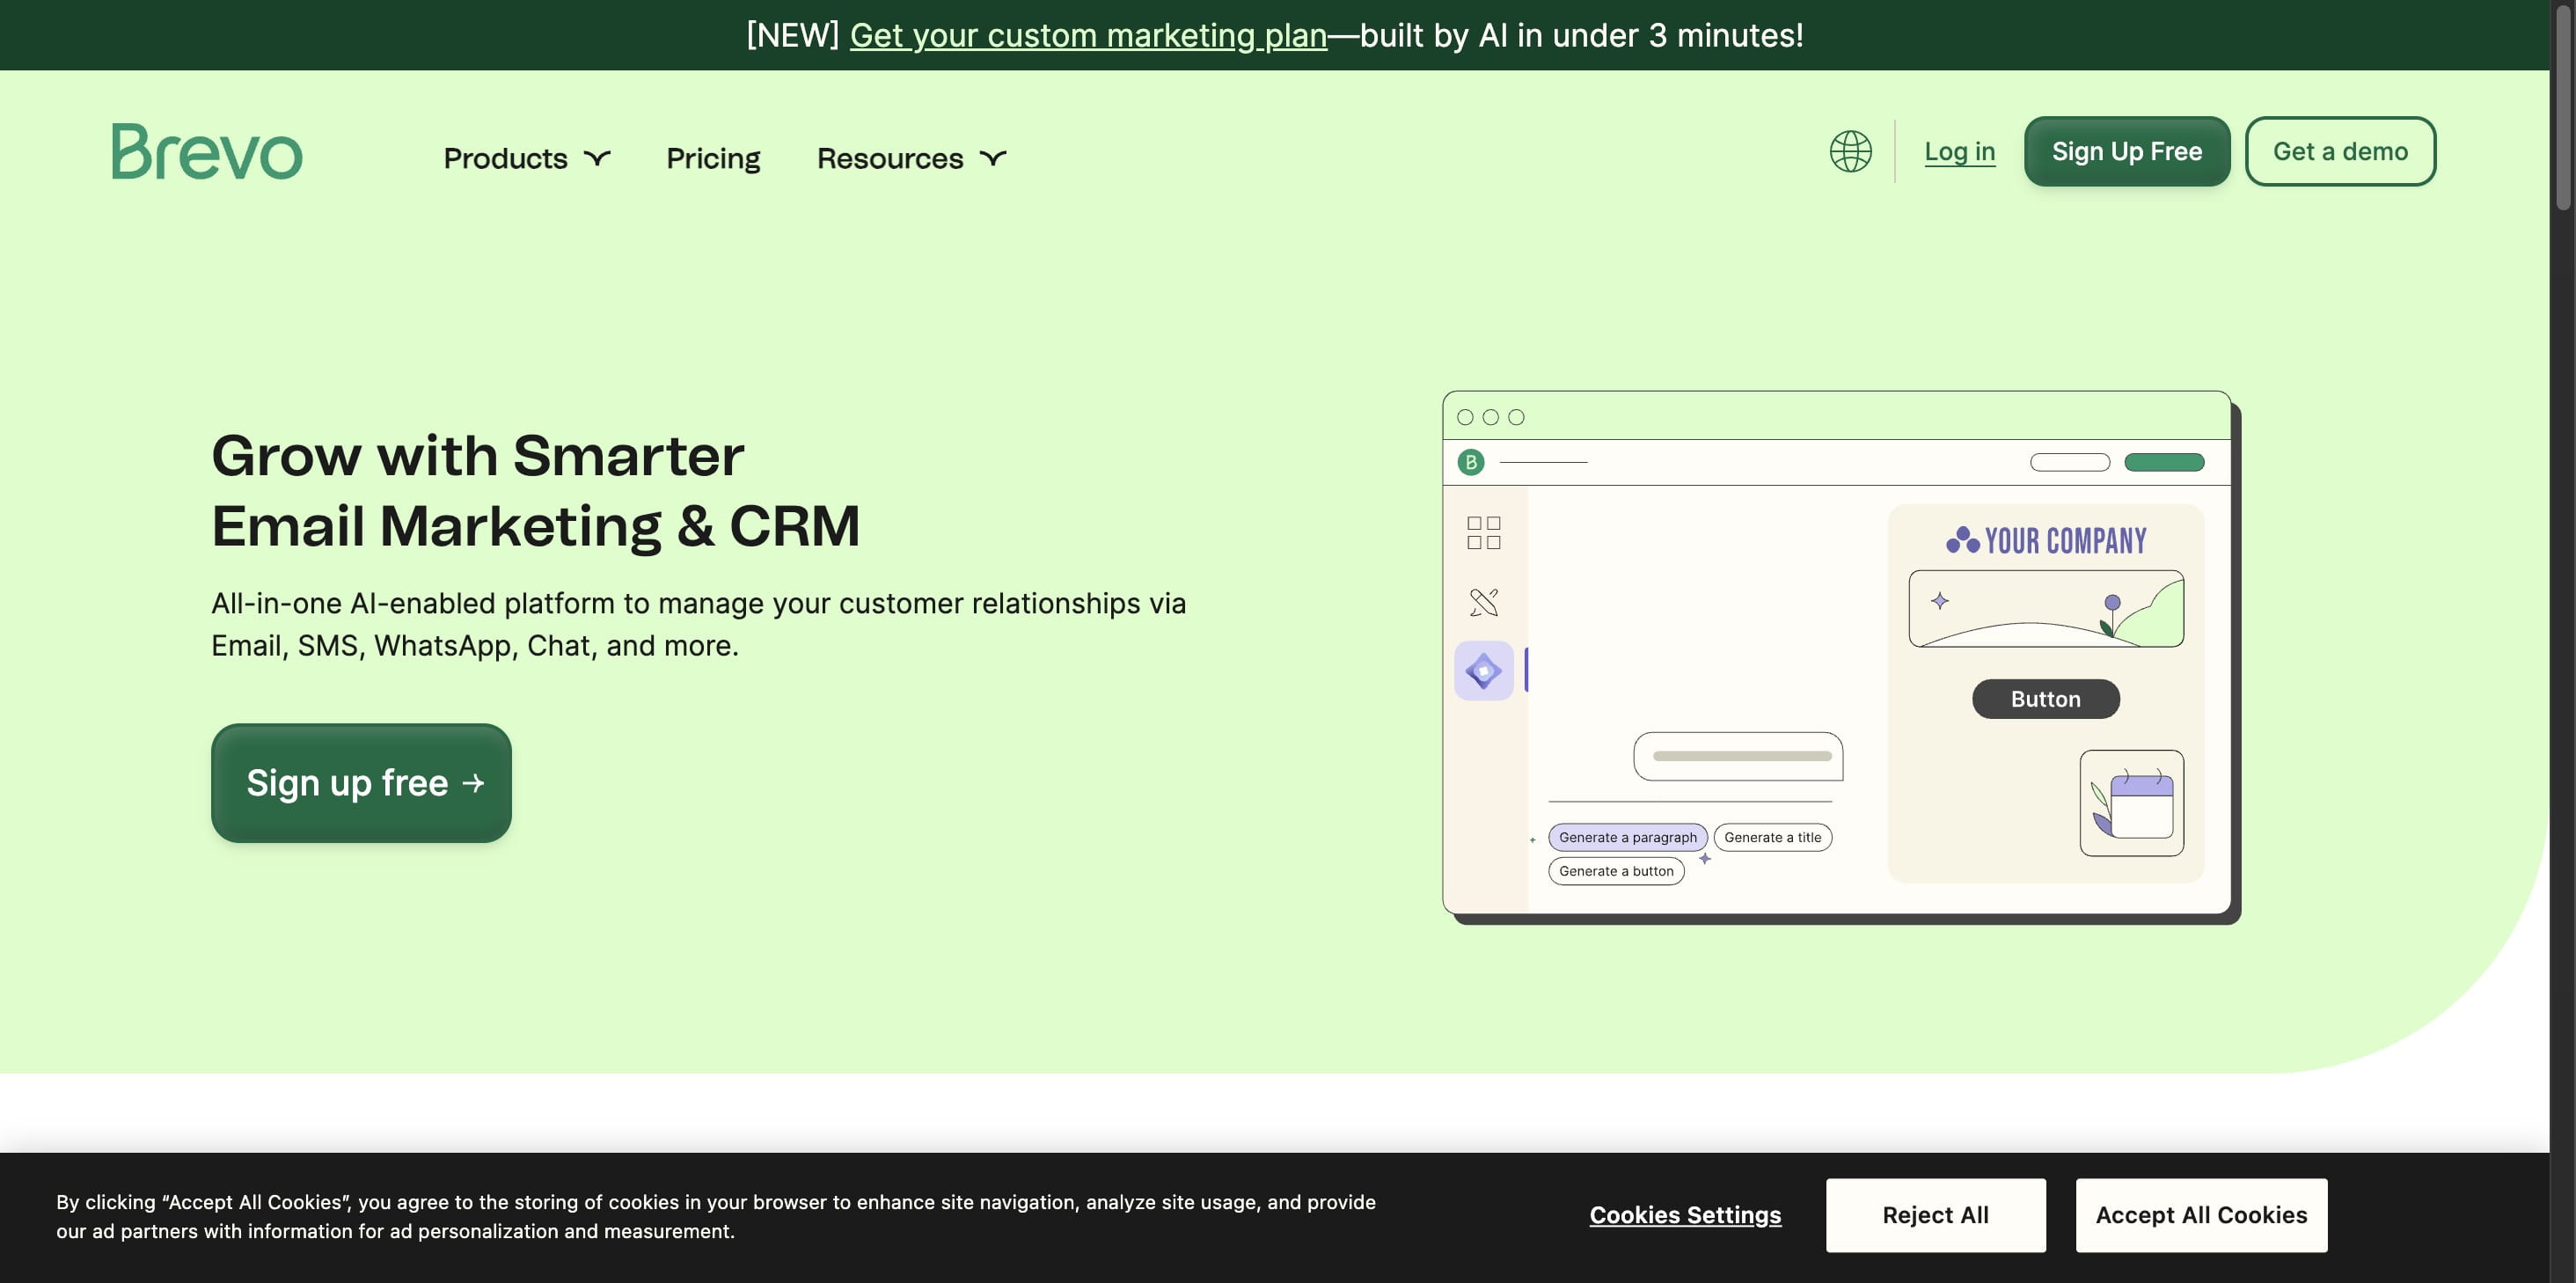
- Navigate to https://www.brevo.com/
Click on "Sign up free"
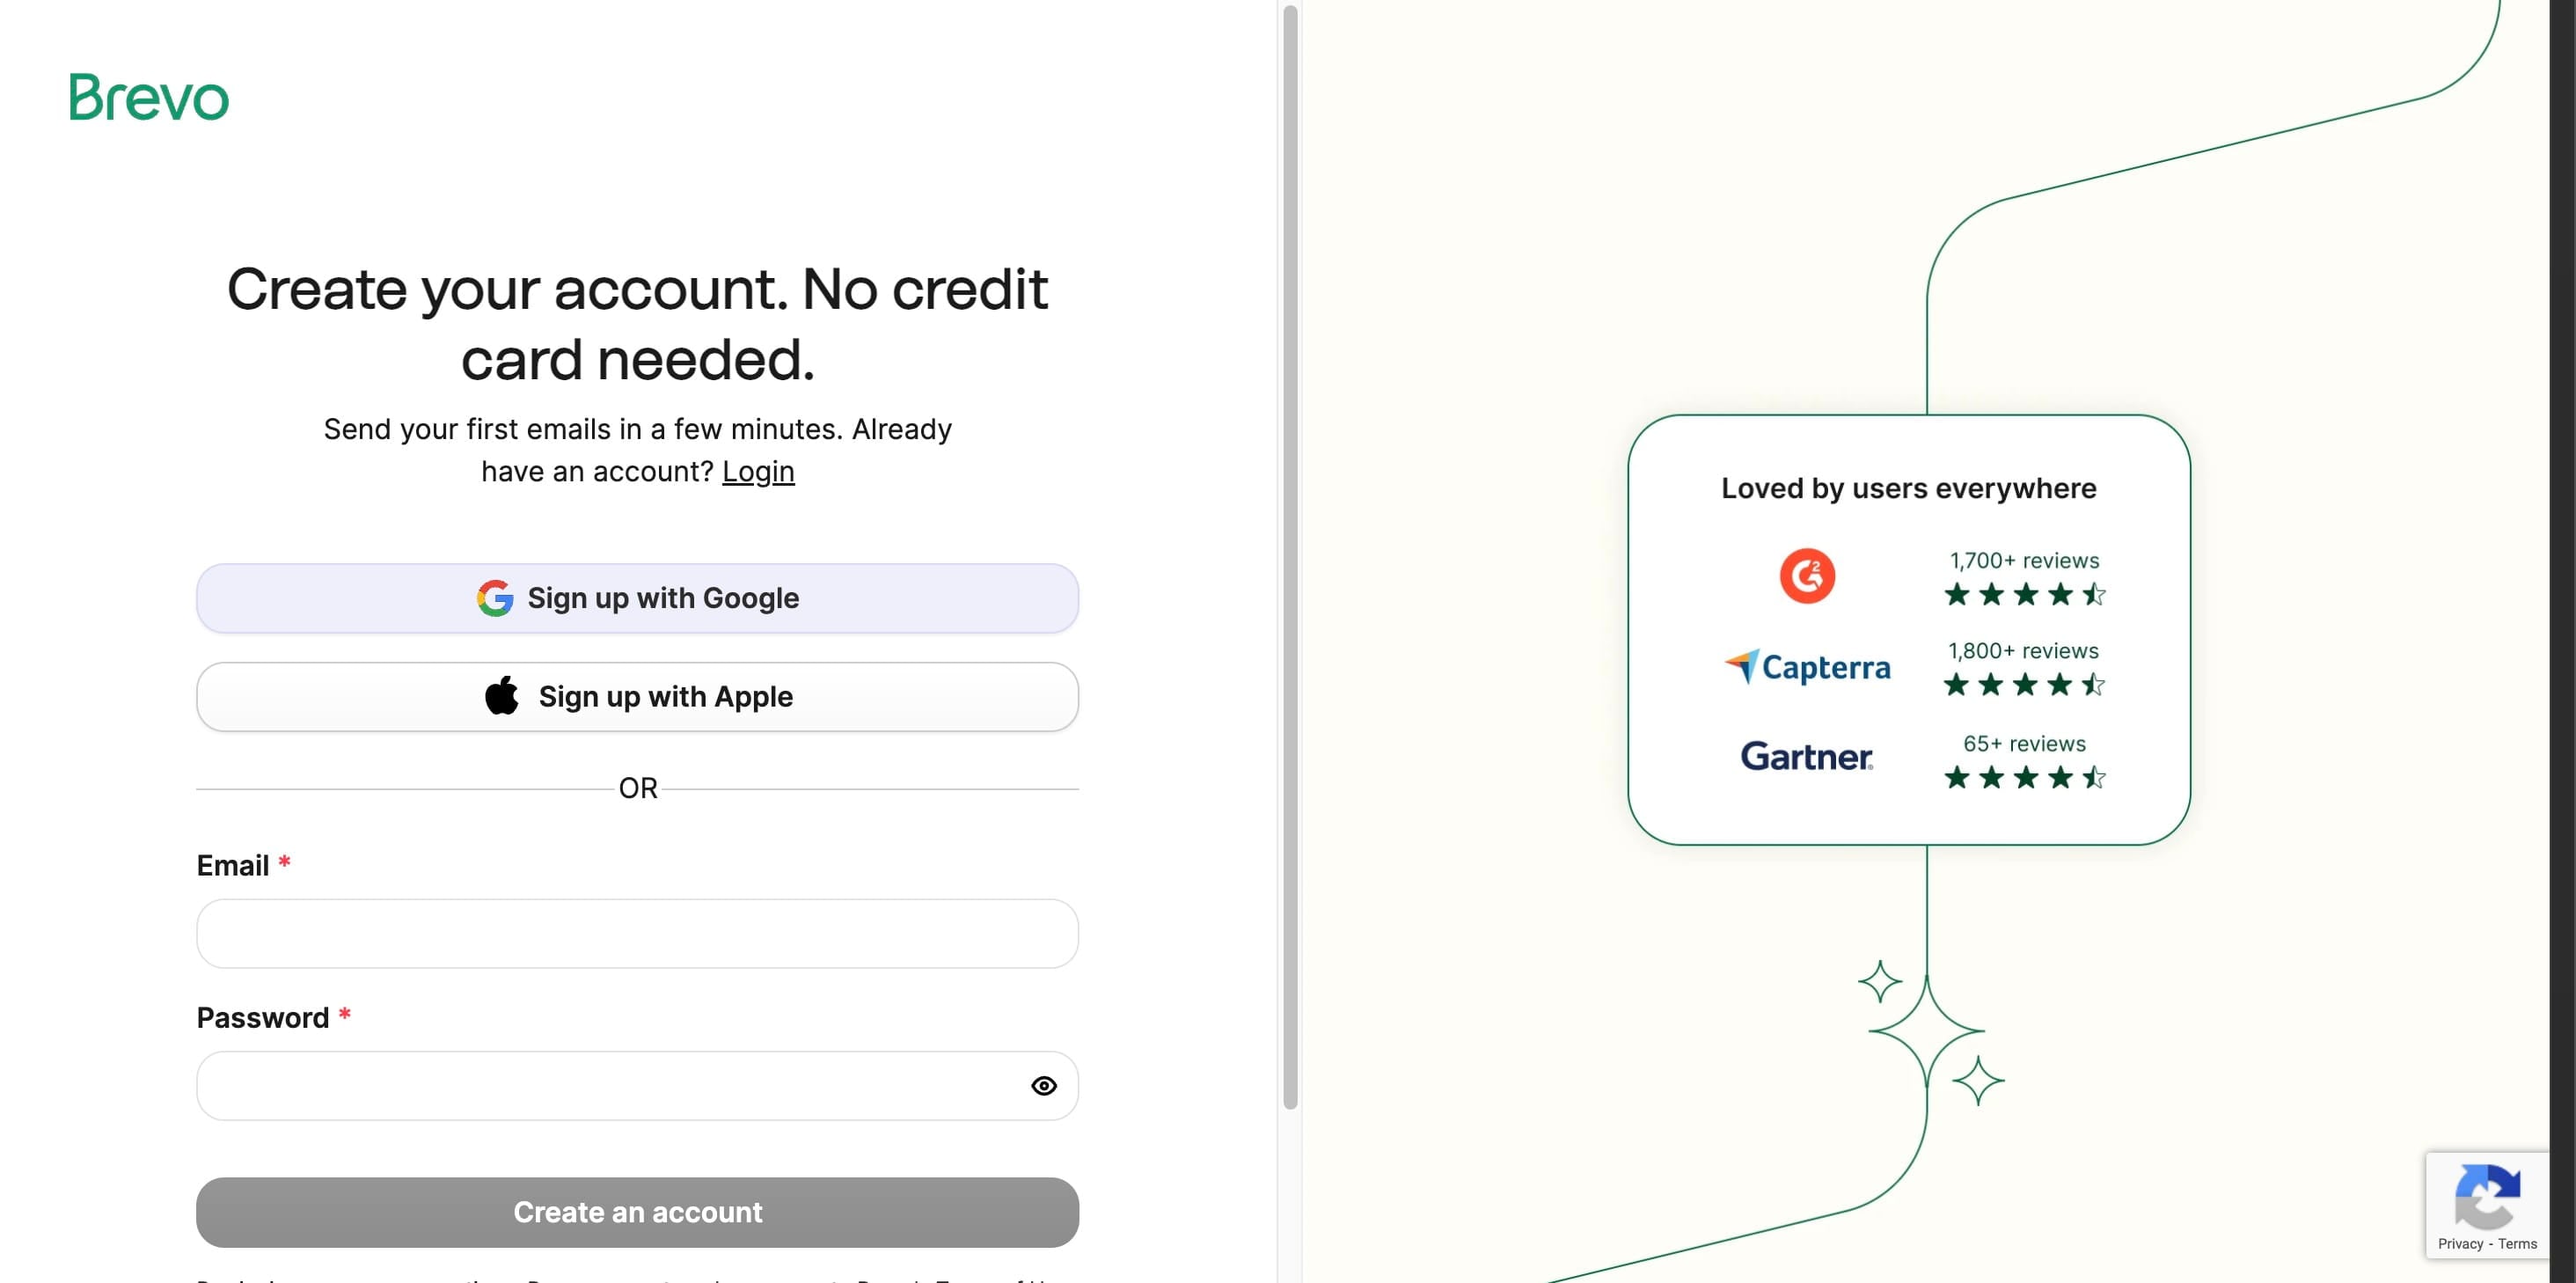
Use your Business Email (e.g., you@yourcompany.com (mailto:you@yourcompany.com))
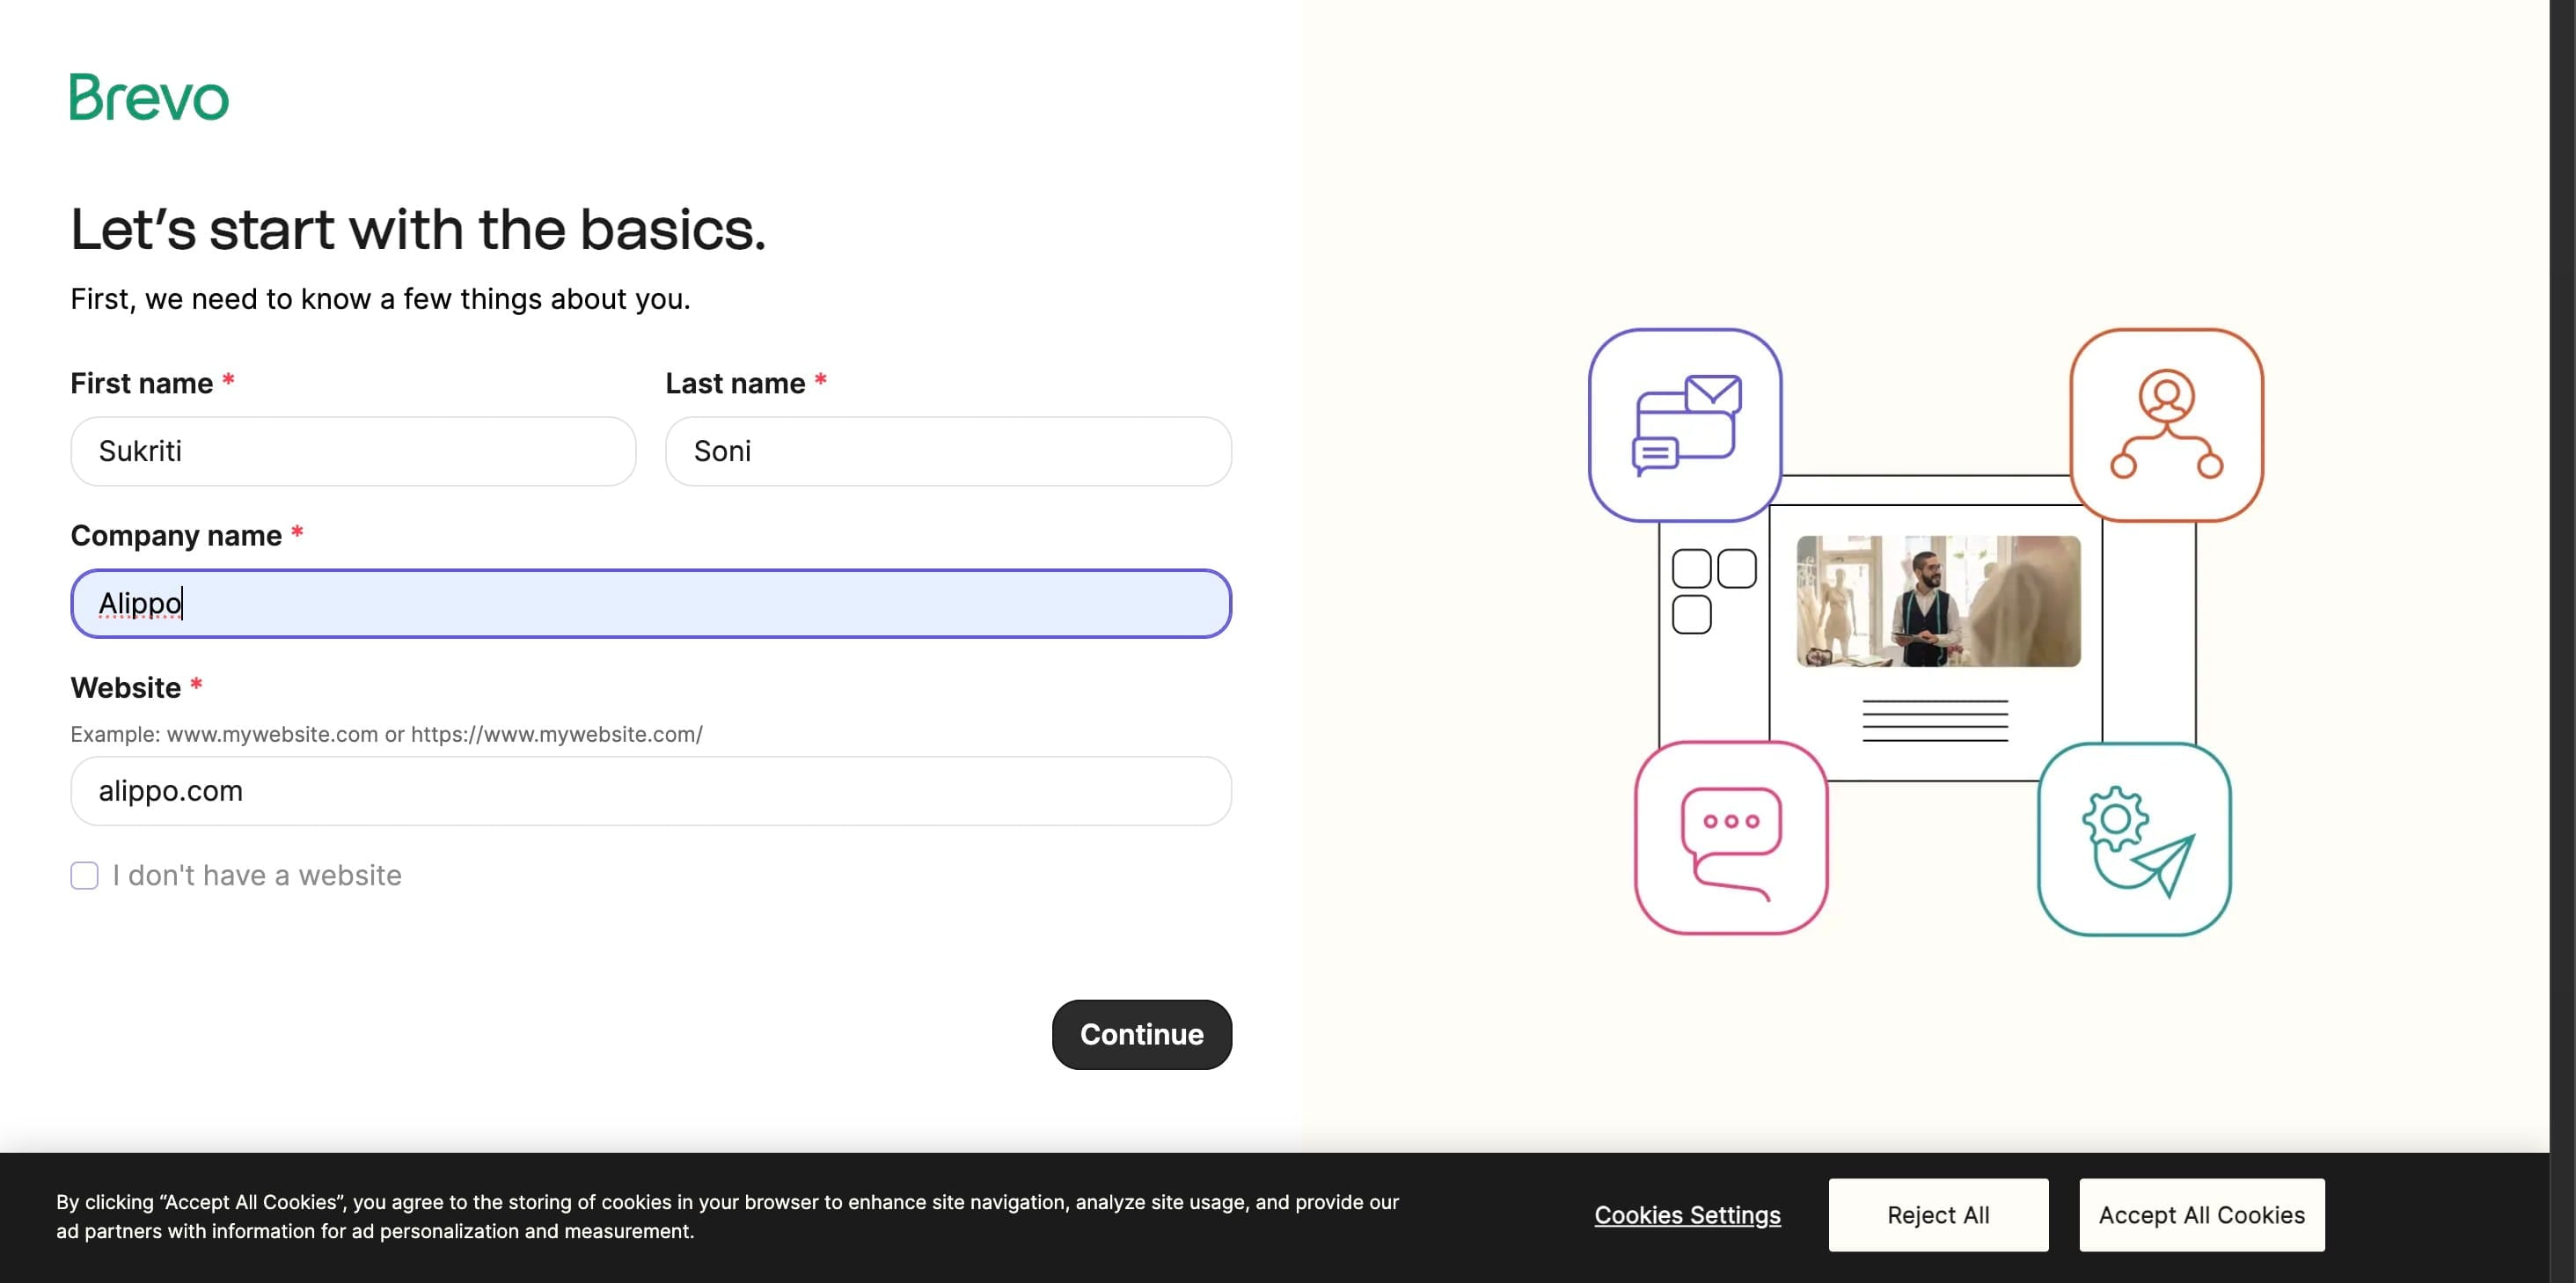
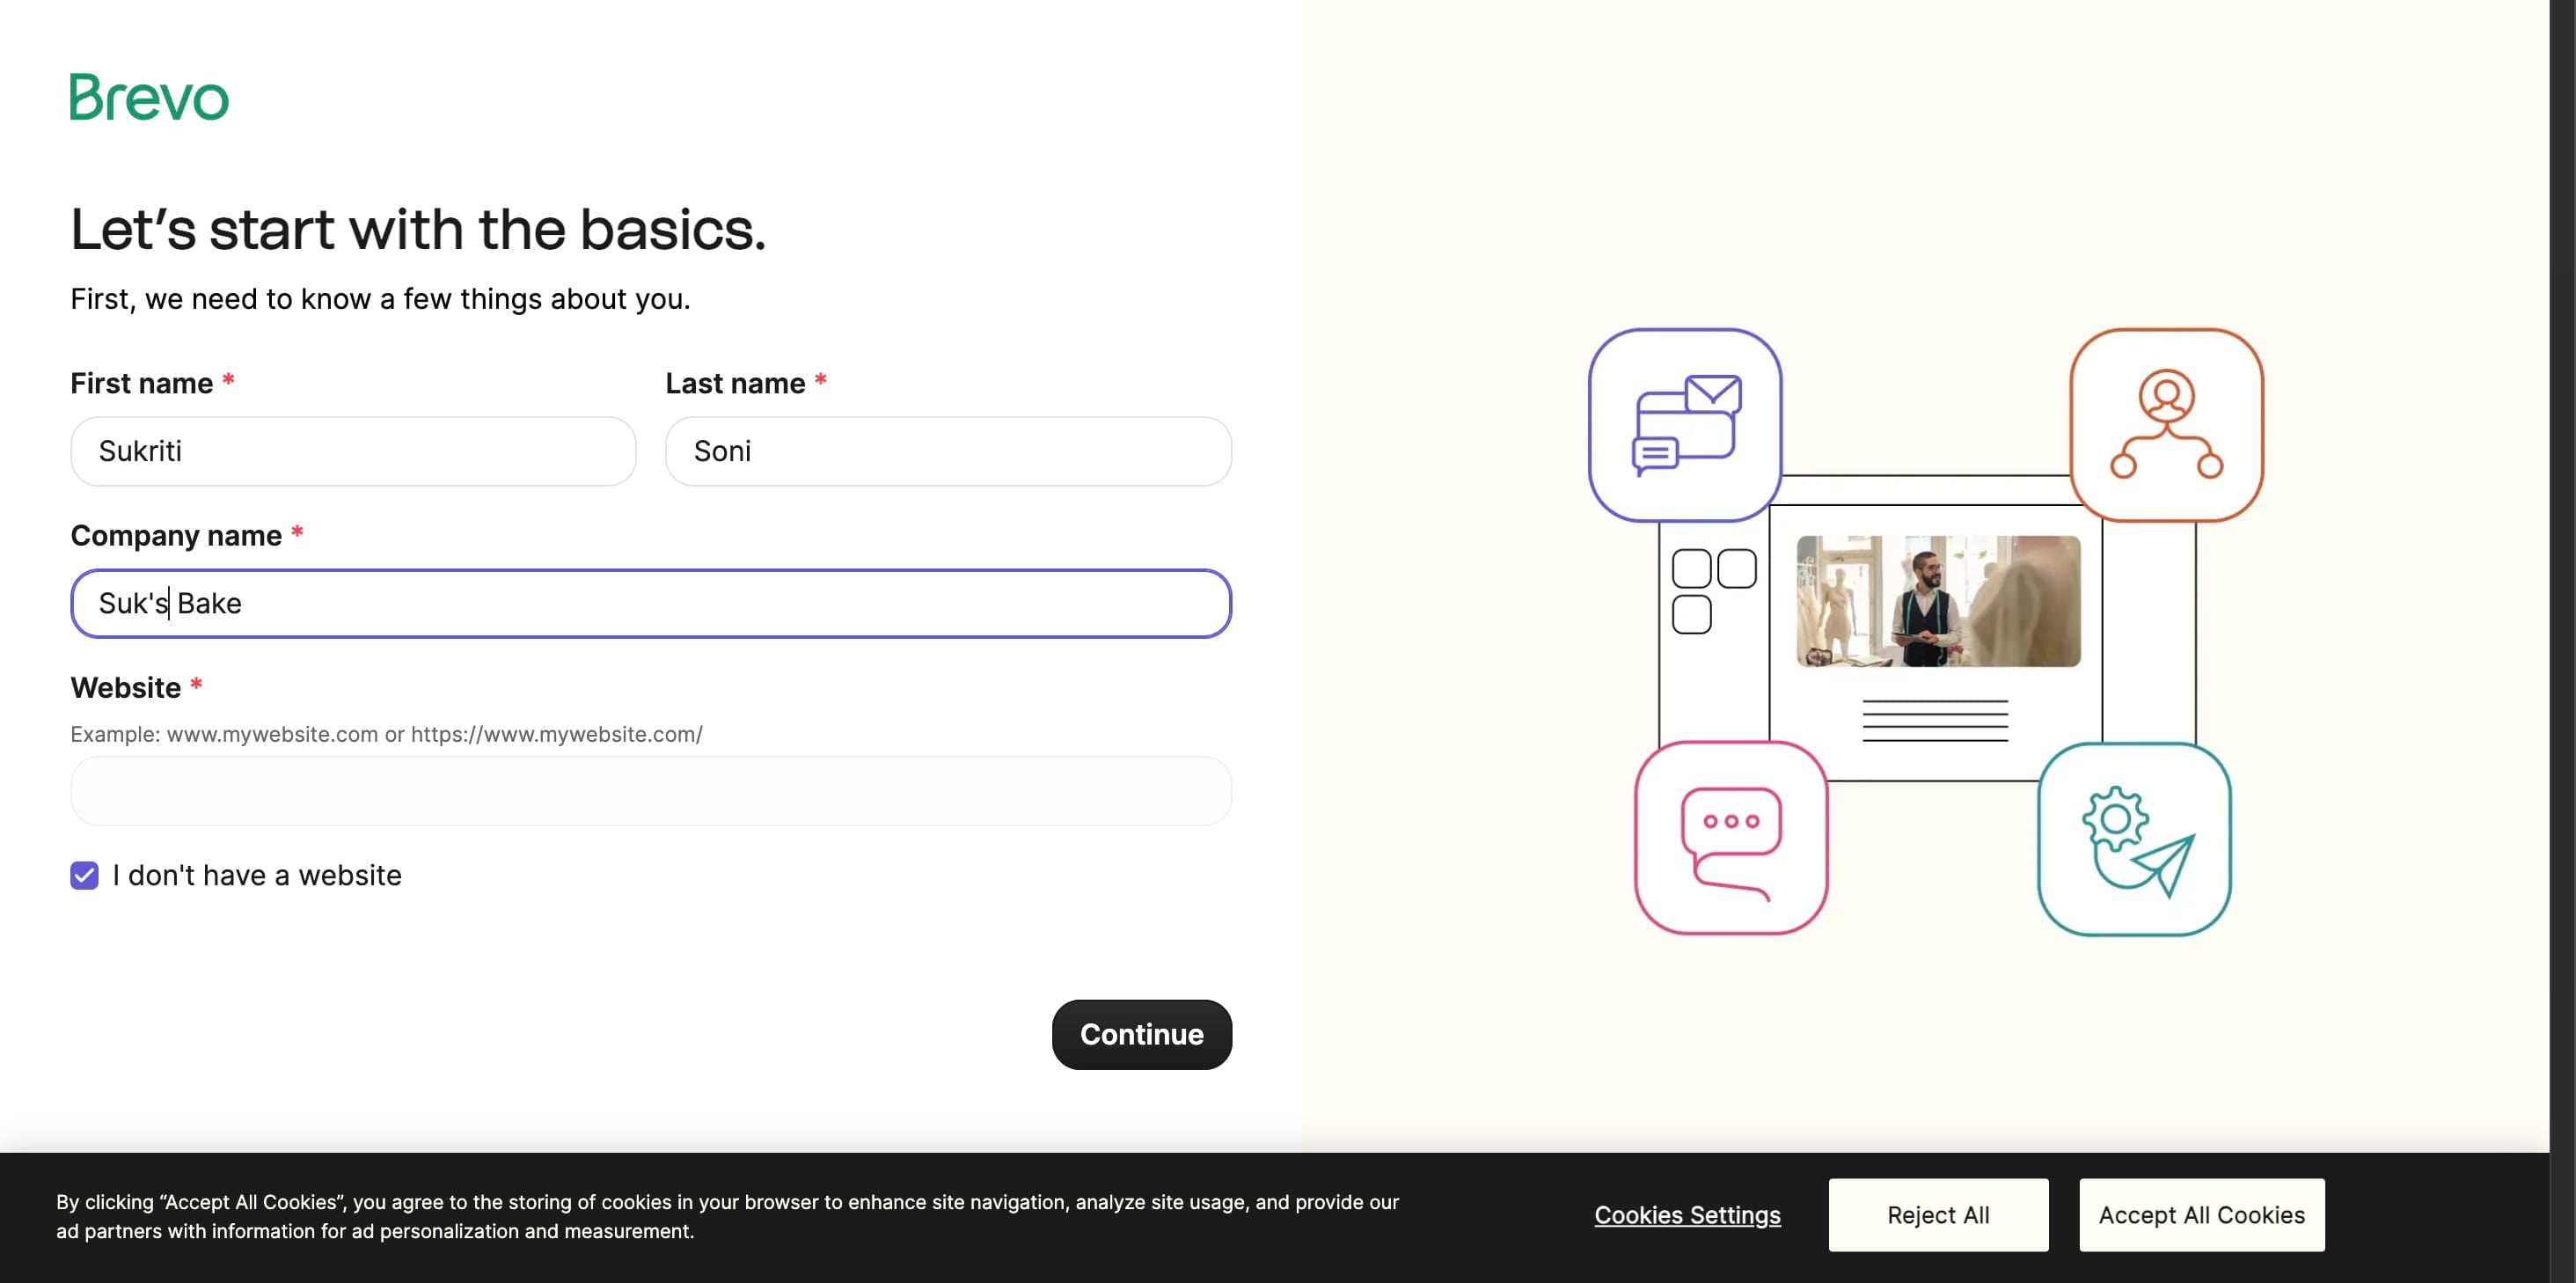
Next, enter your name and company information, then click "Continue".
- Complete Onboarding
After verifying, simply complete the onboarding wizard—it walks you through basic profile and sending-address setup.
Please enter your name, company name, and any other relevant information in the provided fields, then click "Continue."
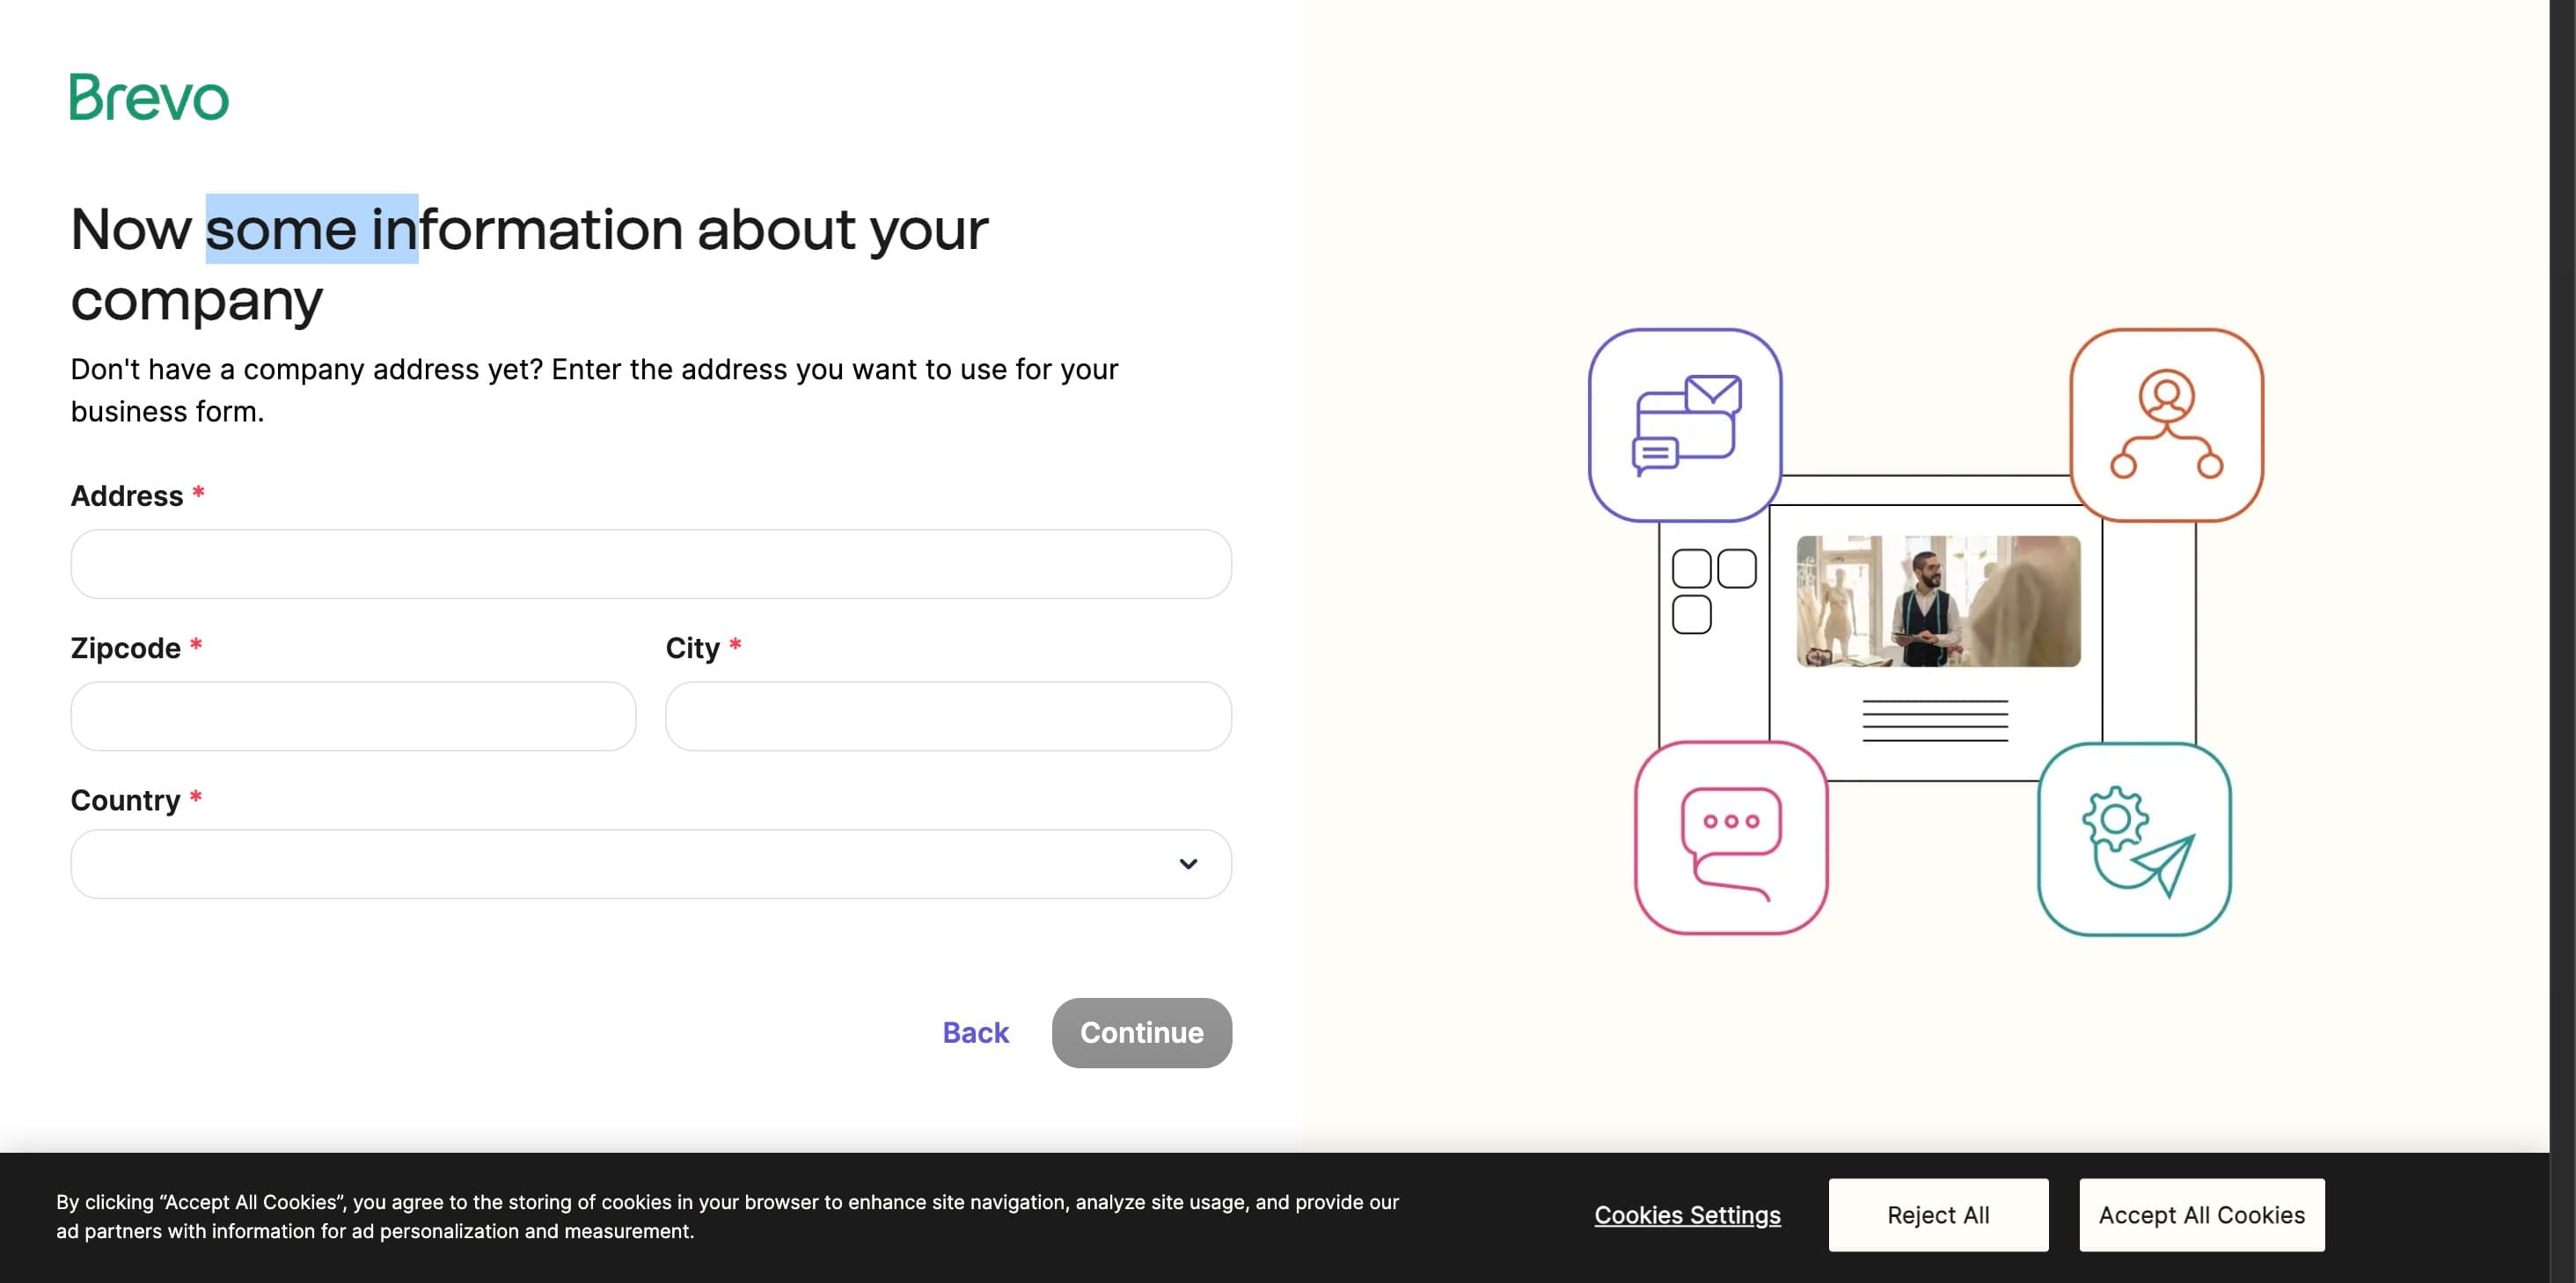
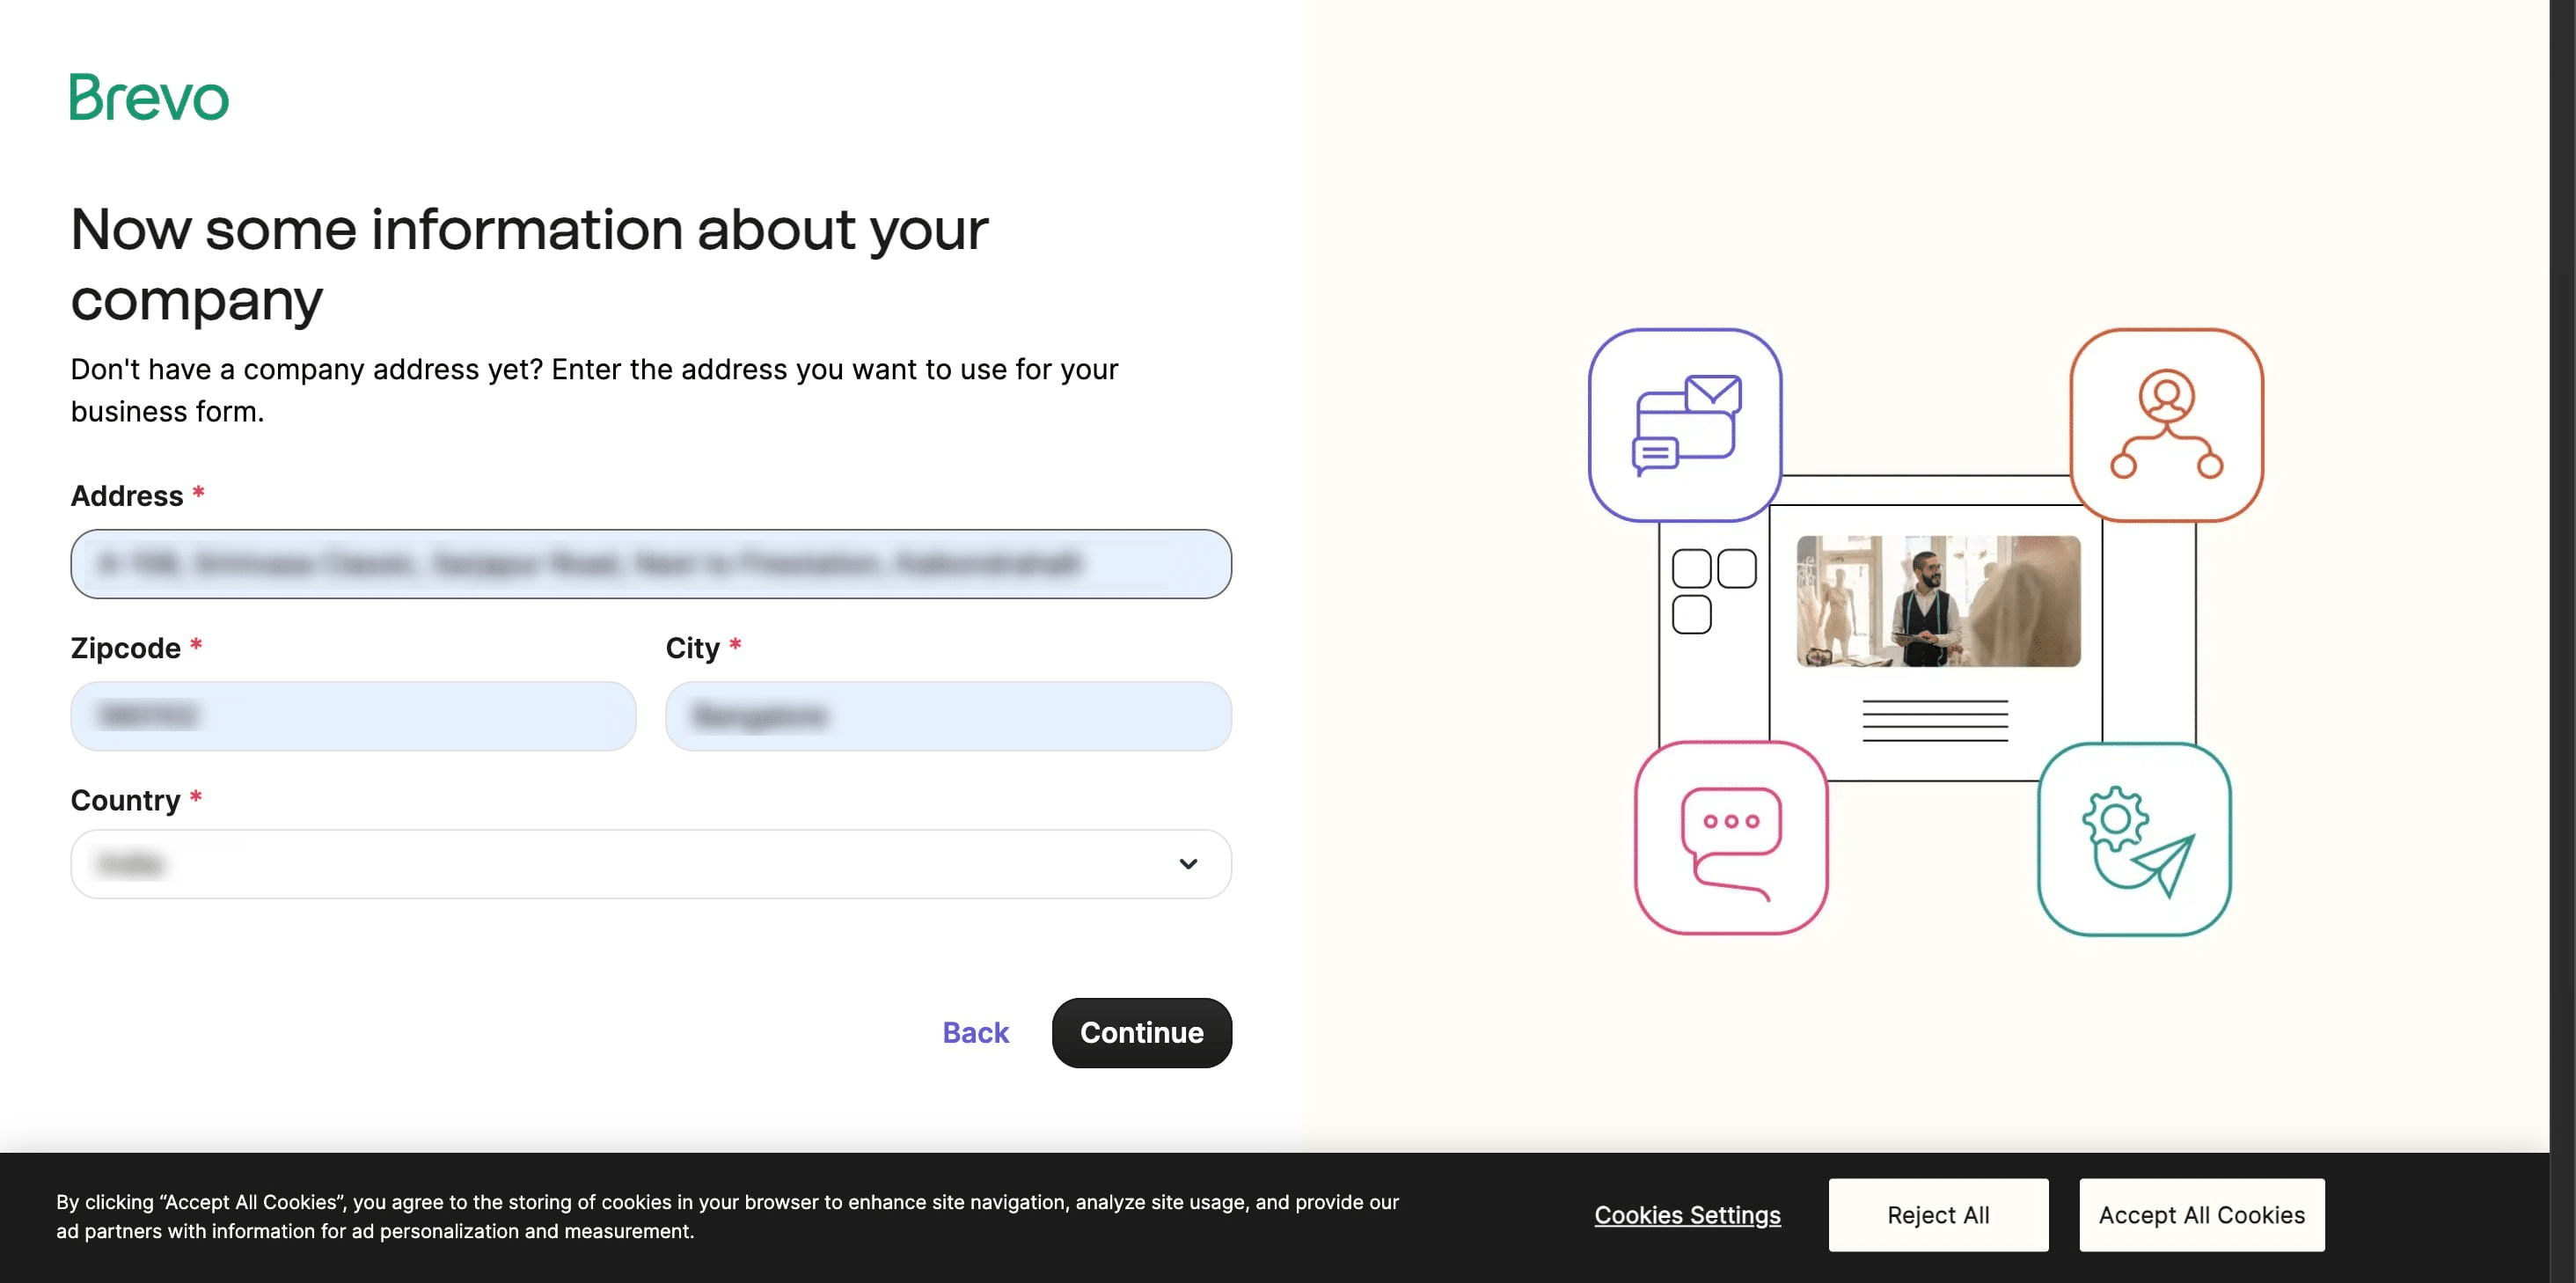
Please provide your full address, including street, city, zip code, and country and click on "Continue"
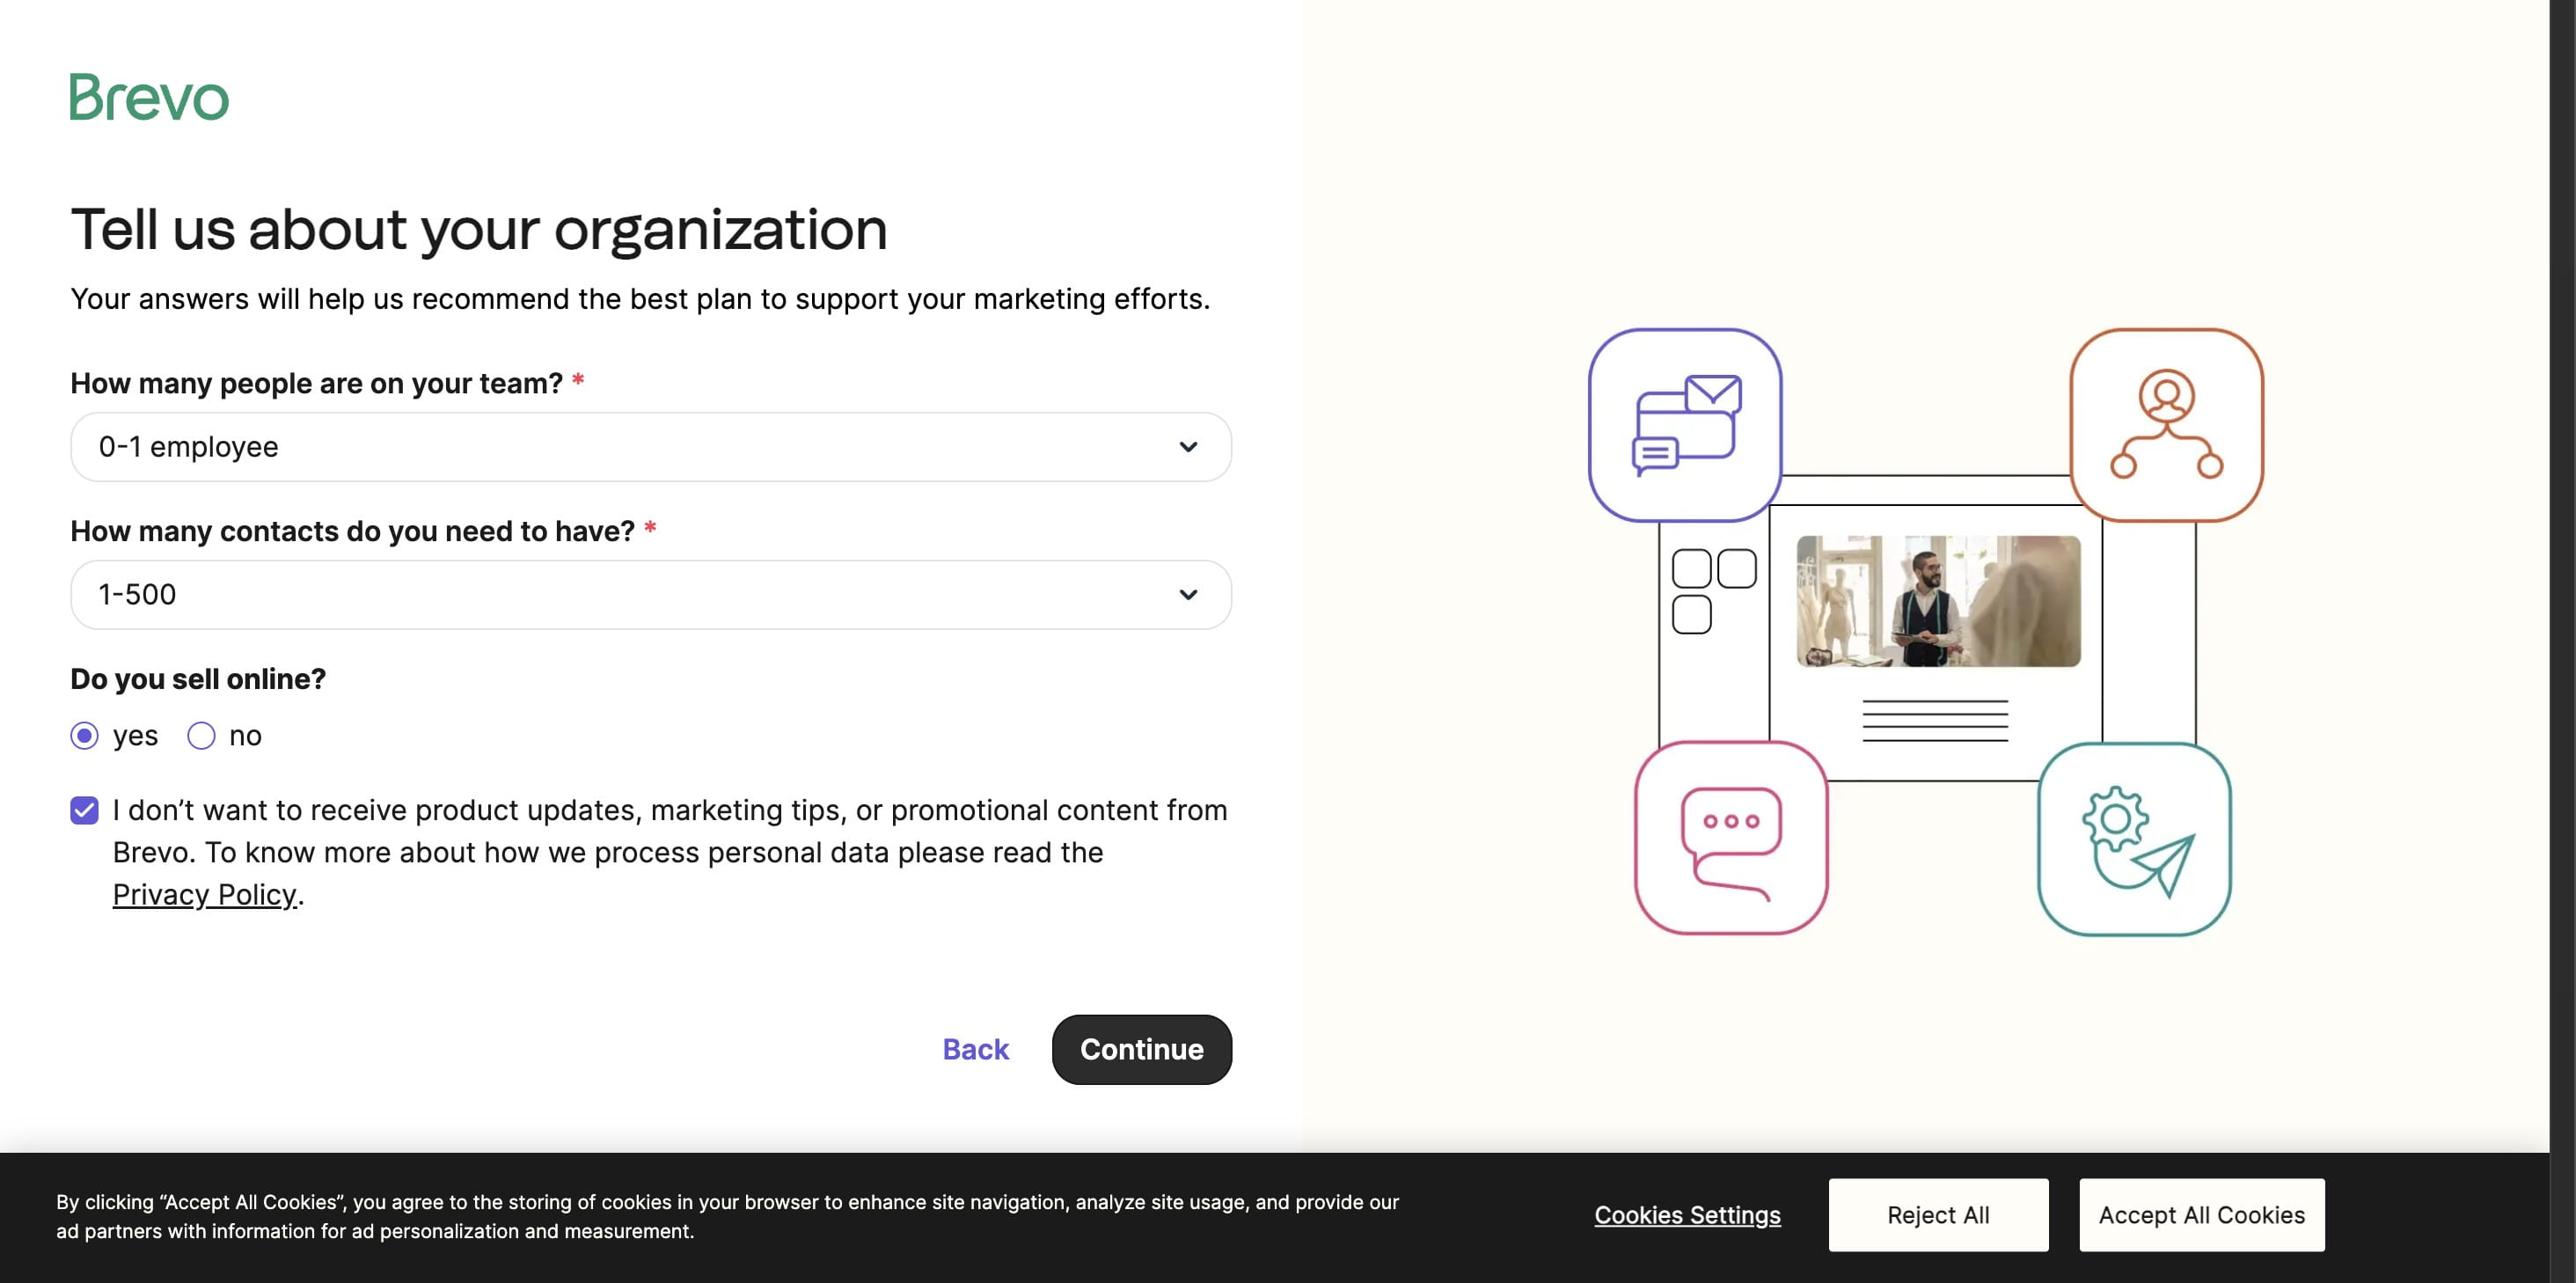
Provide detailed information about your organization. Include information about your team, contact details, and business model. Once you have completed these details, press 'Continue'.
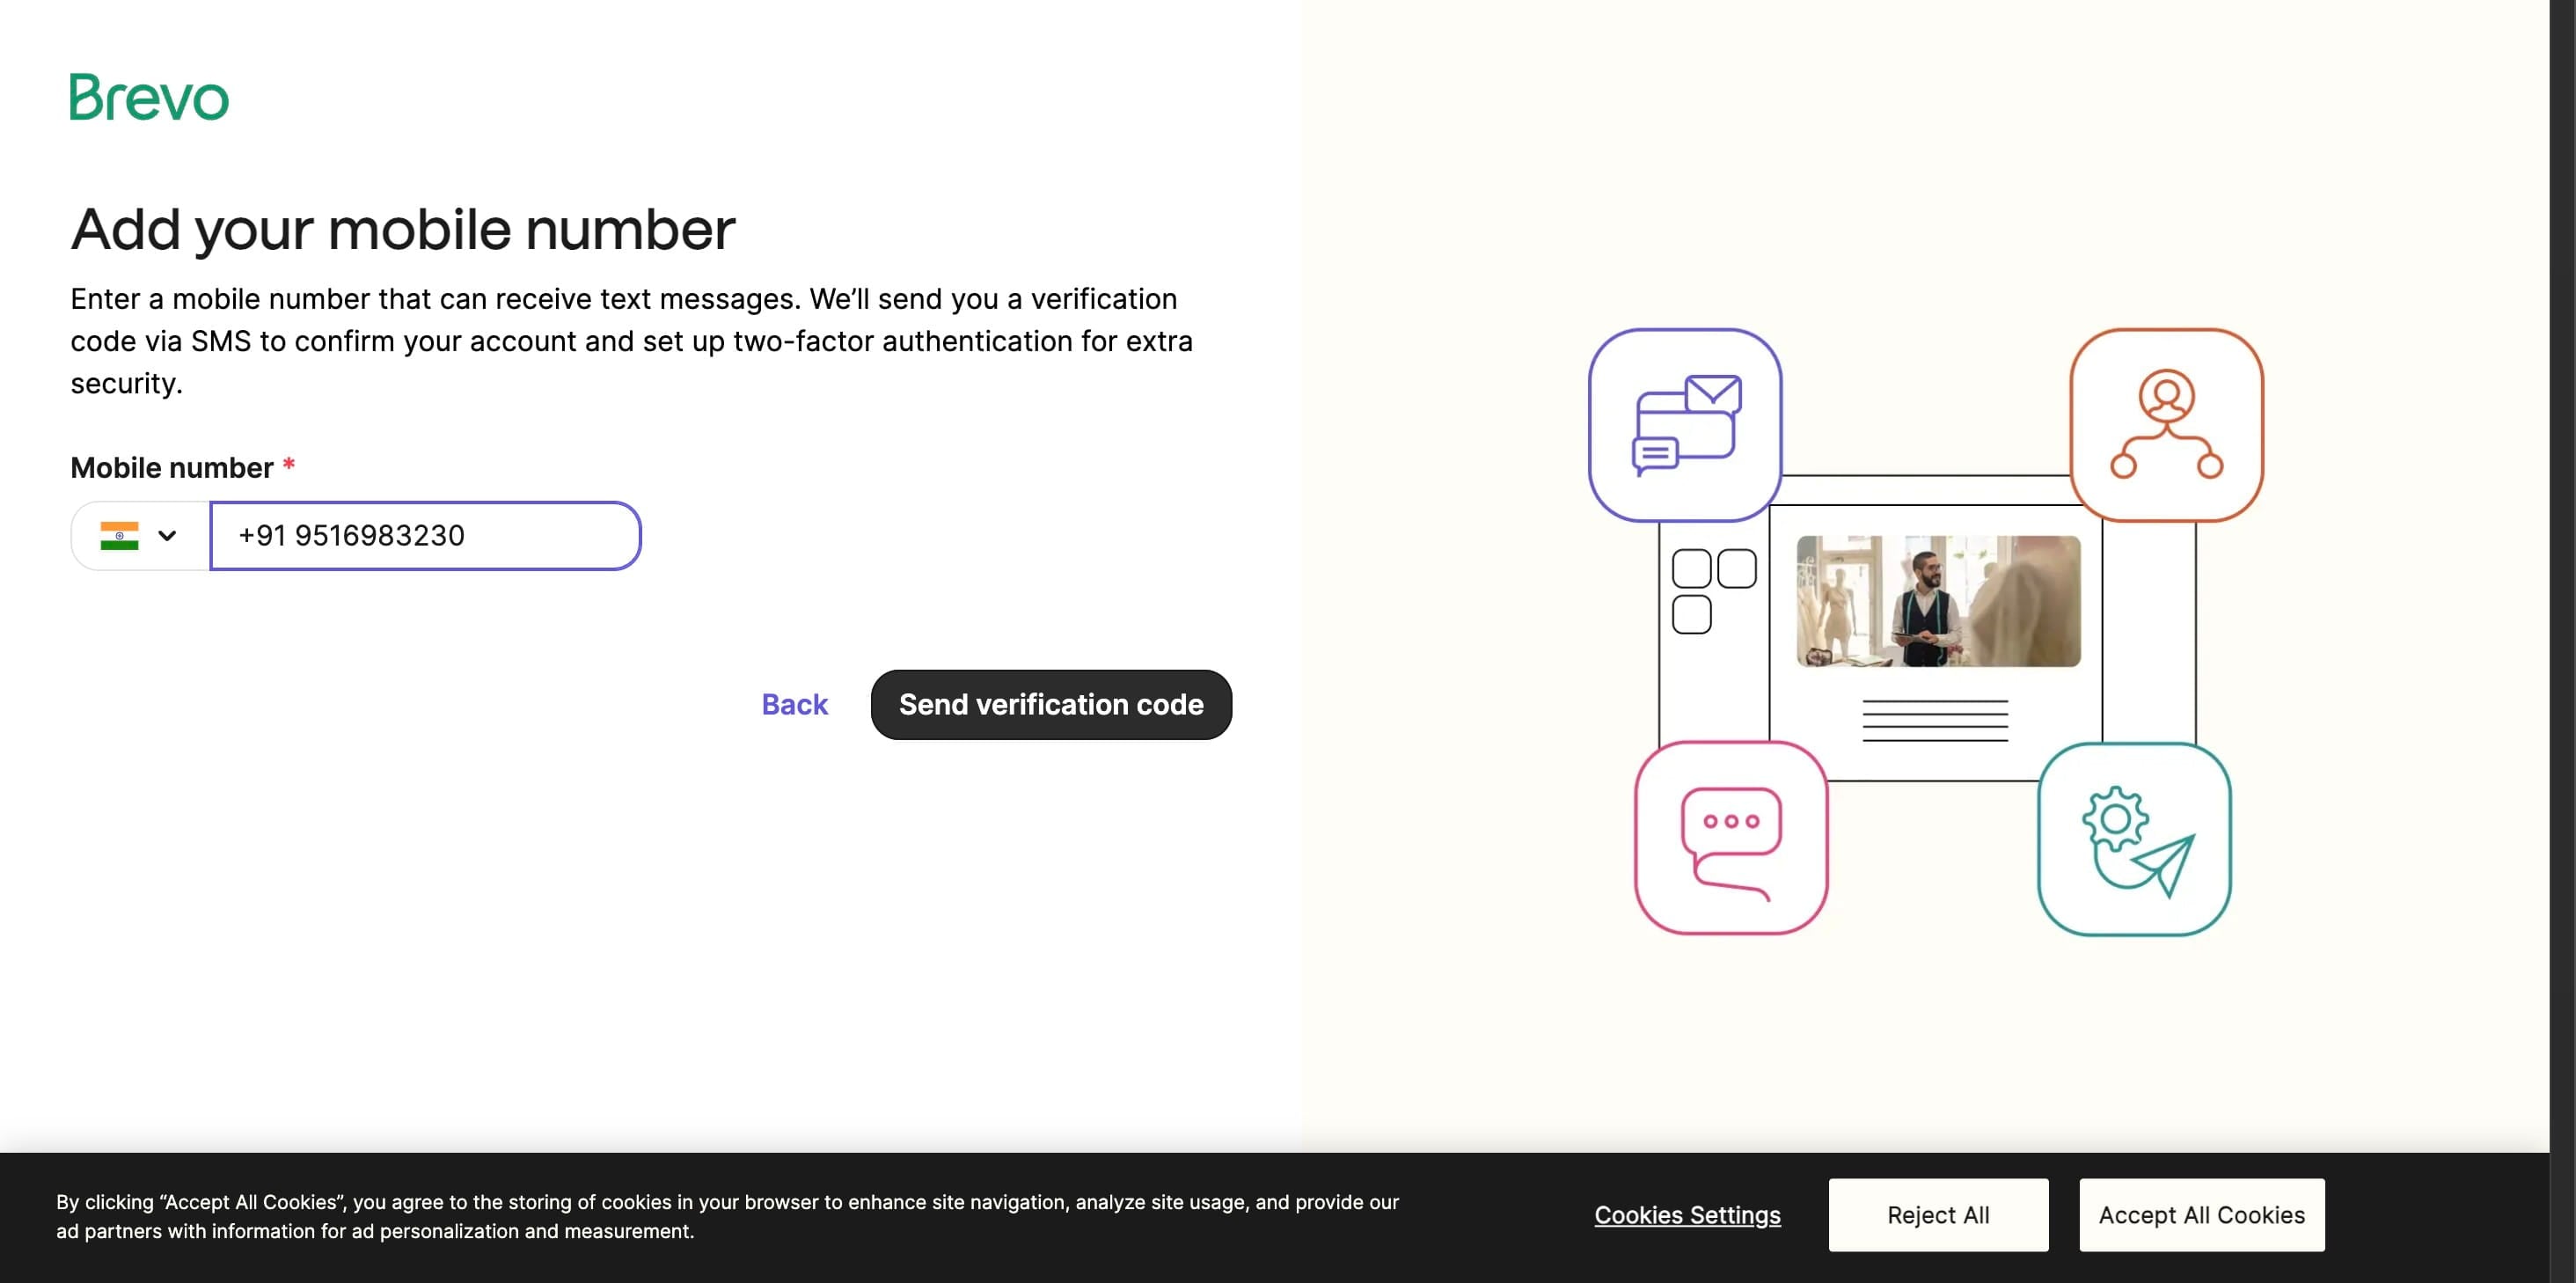
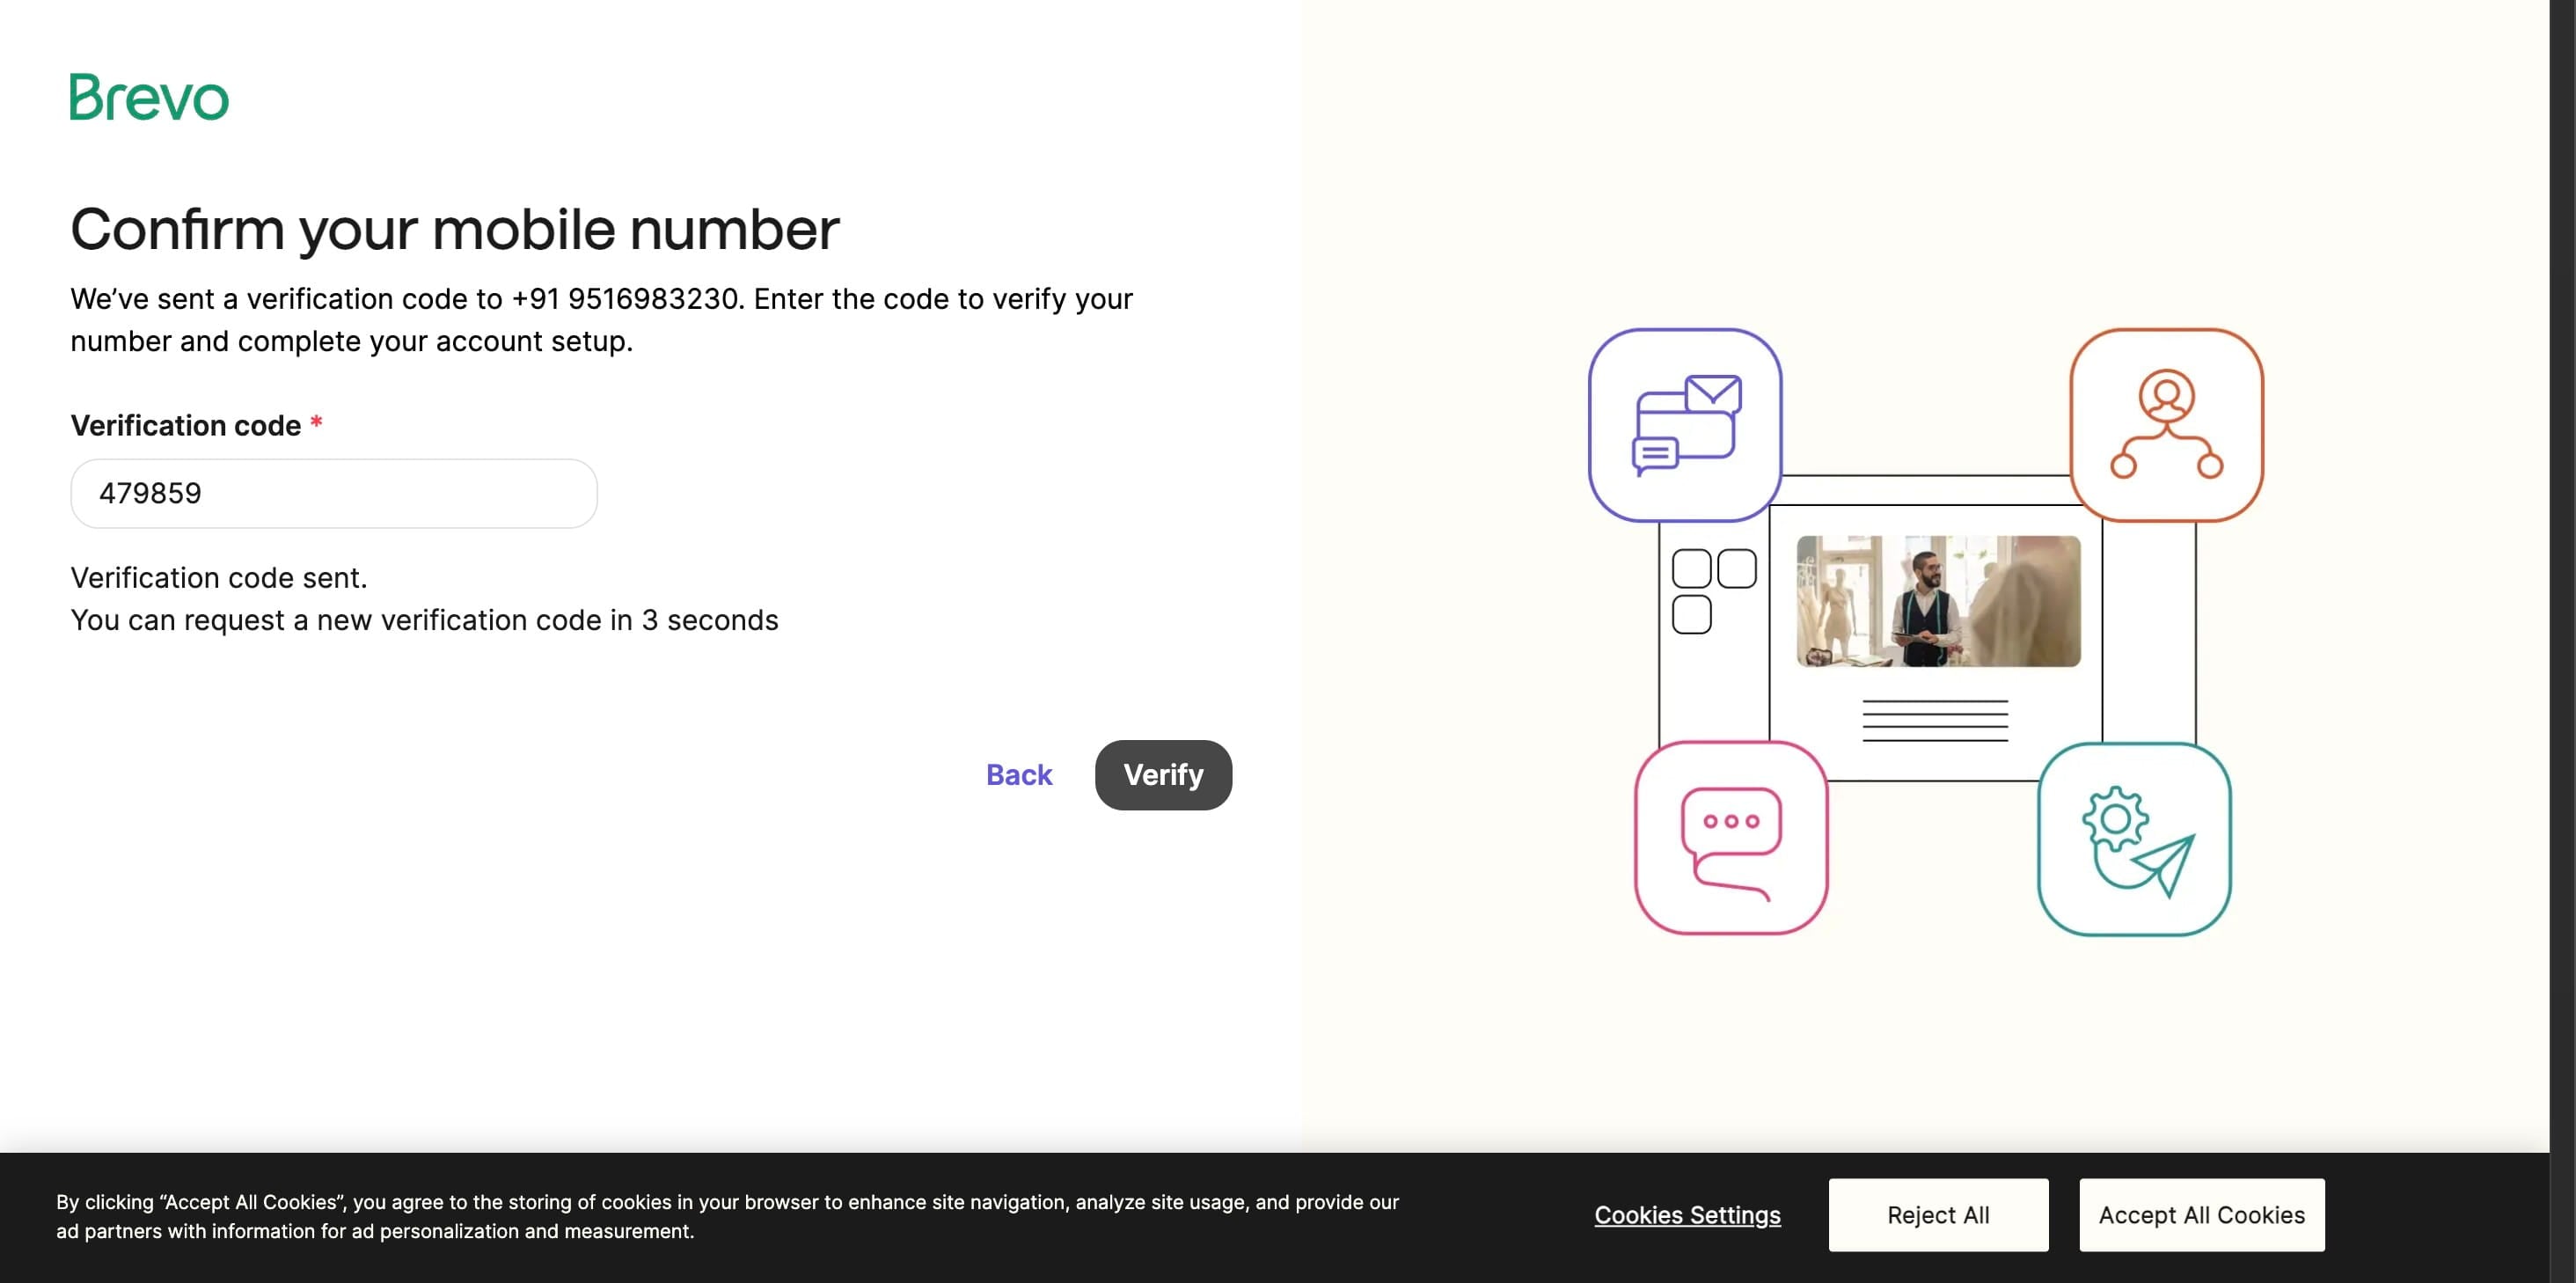
Please enter your contact number in the field and proceed to verify the OTP.
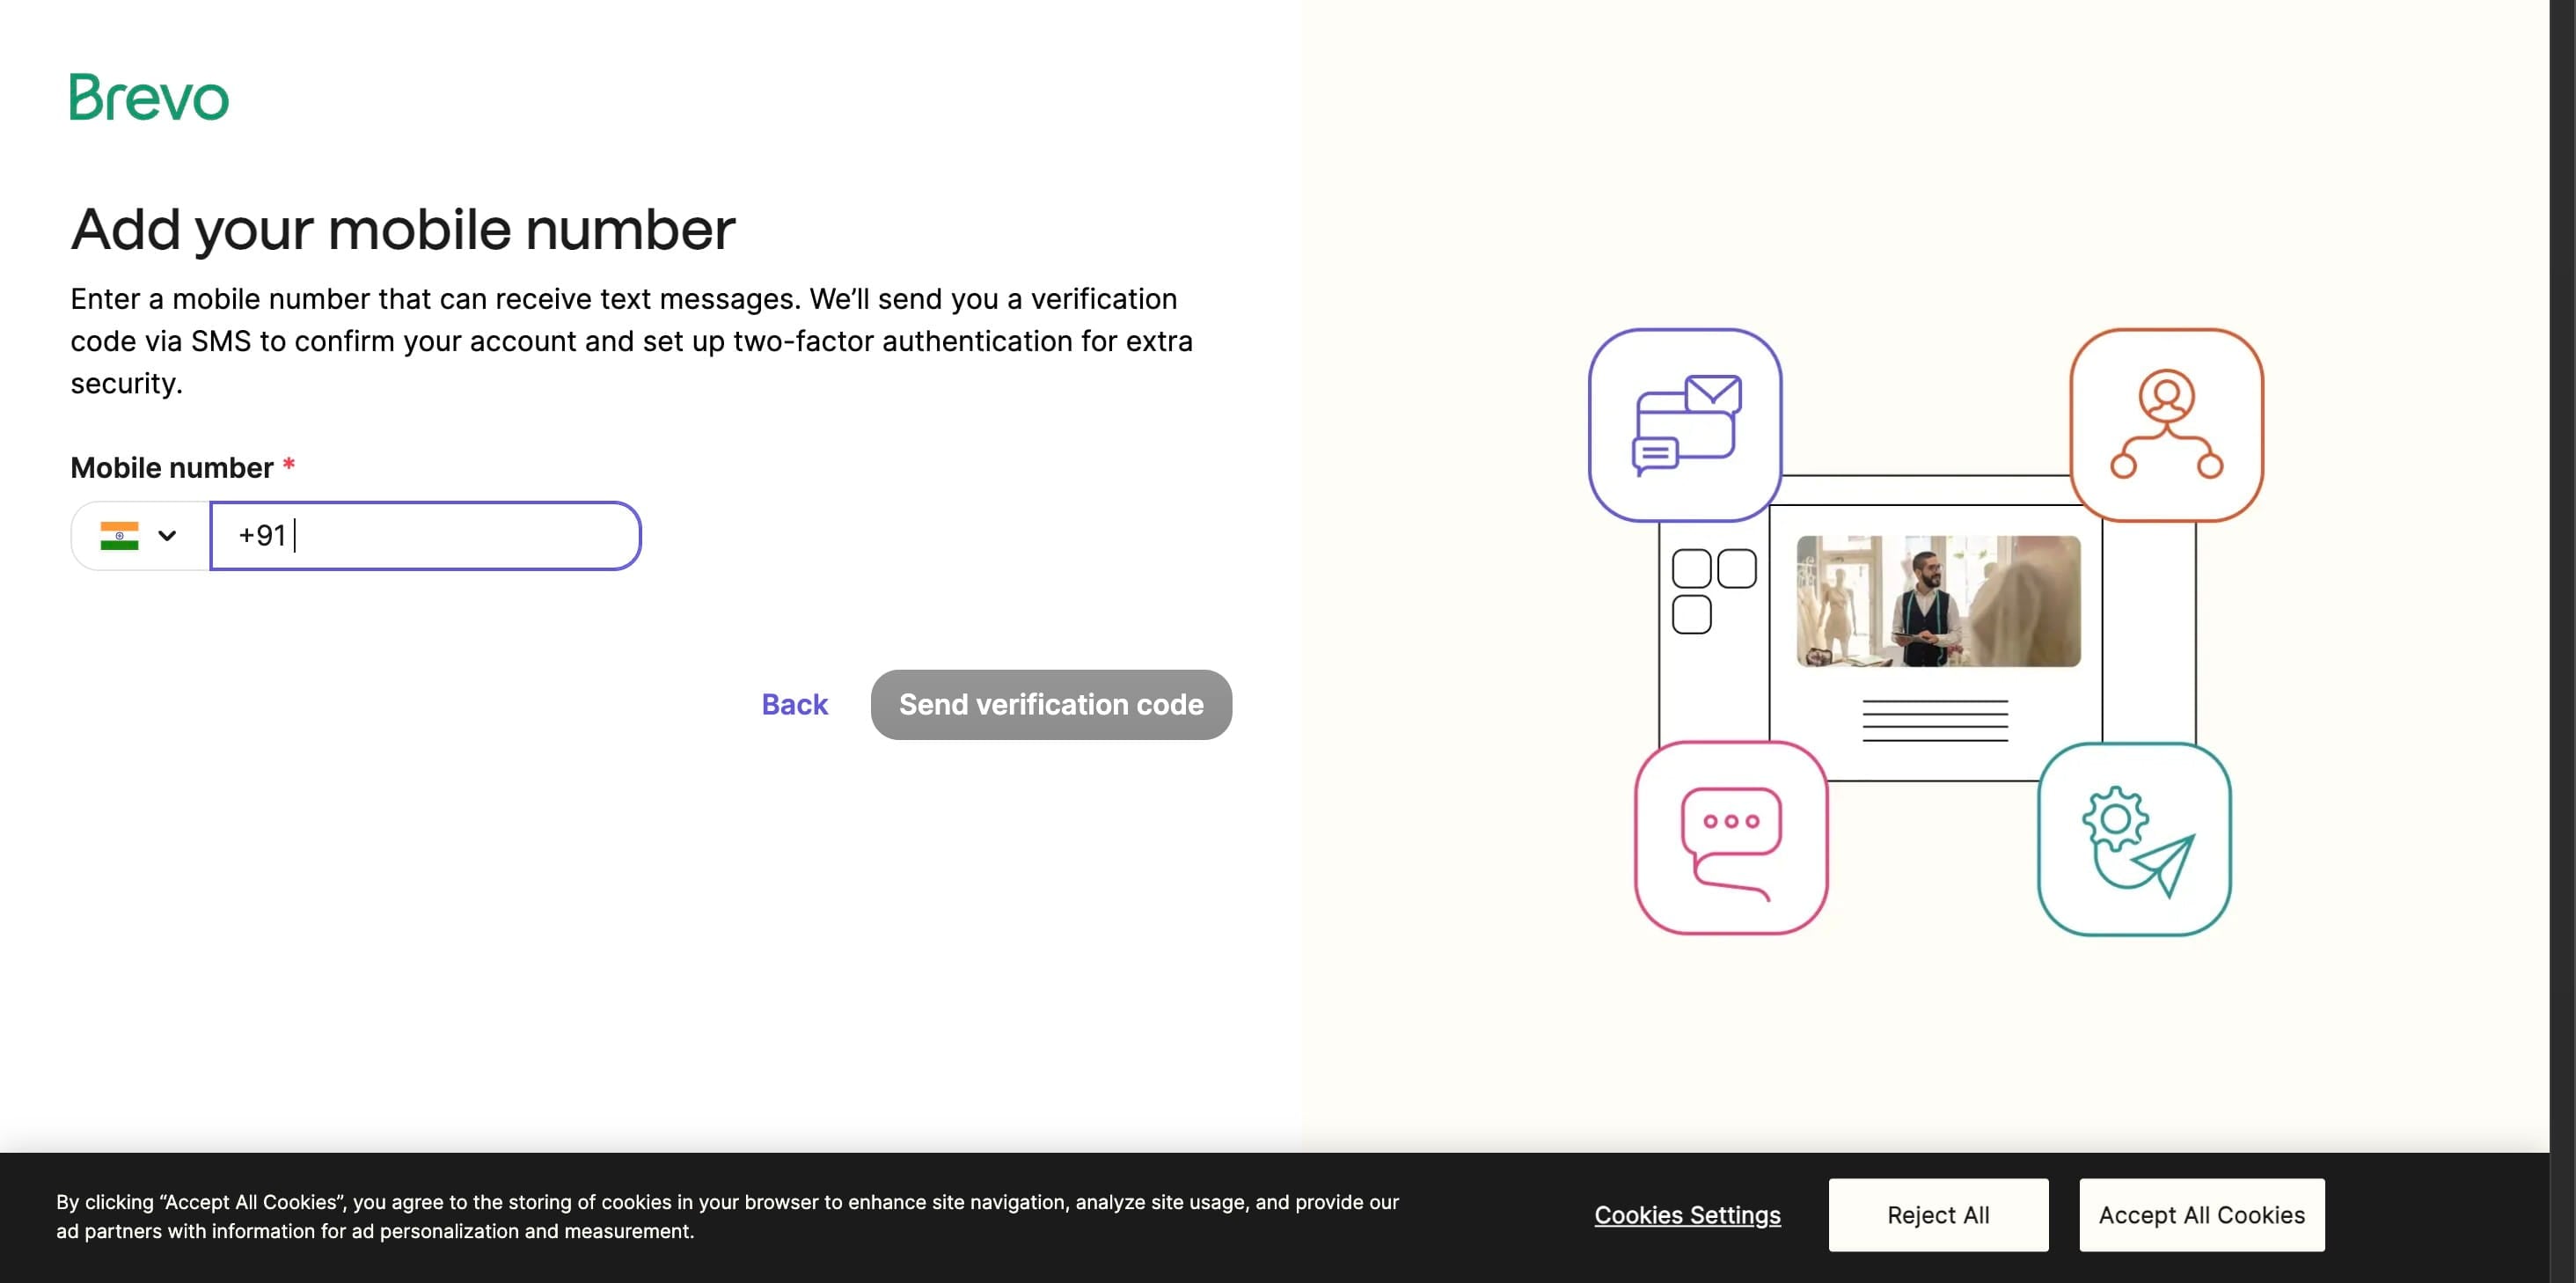
Click on "Send verification code"
Click to "Verify"
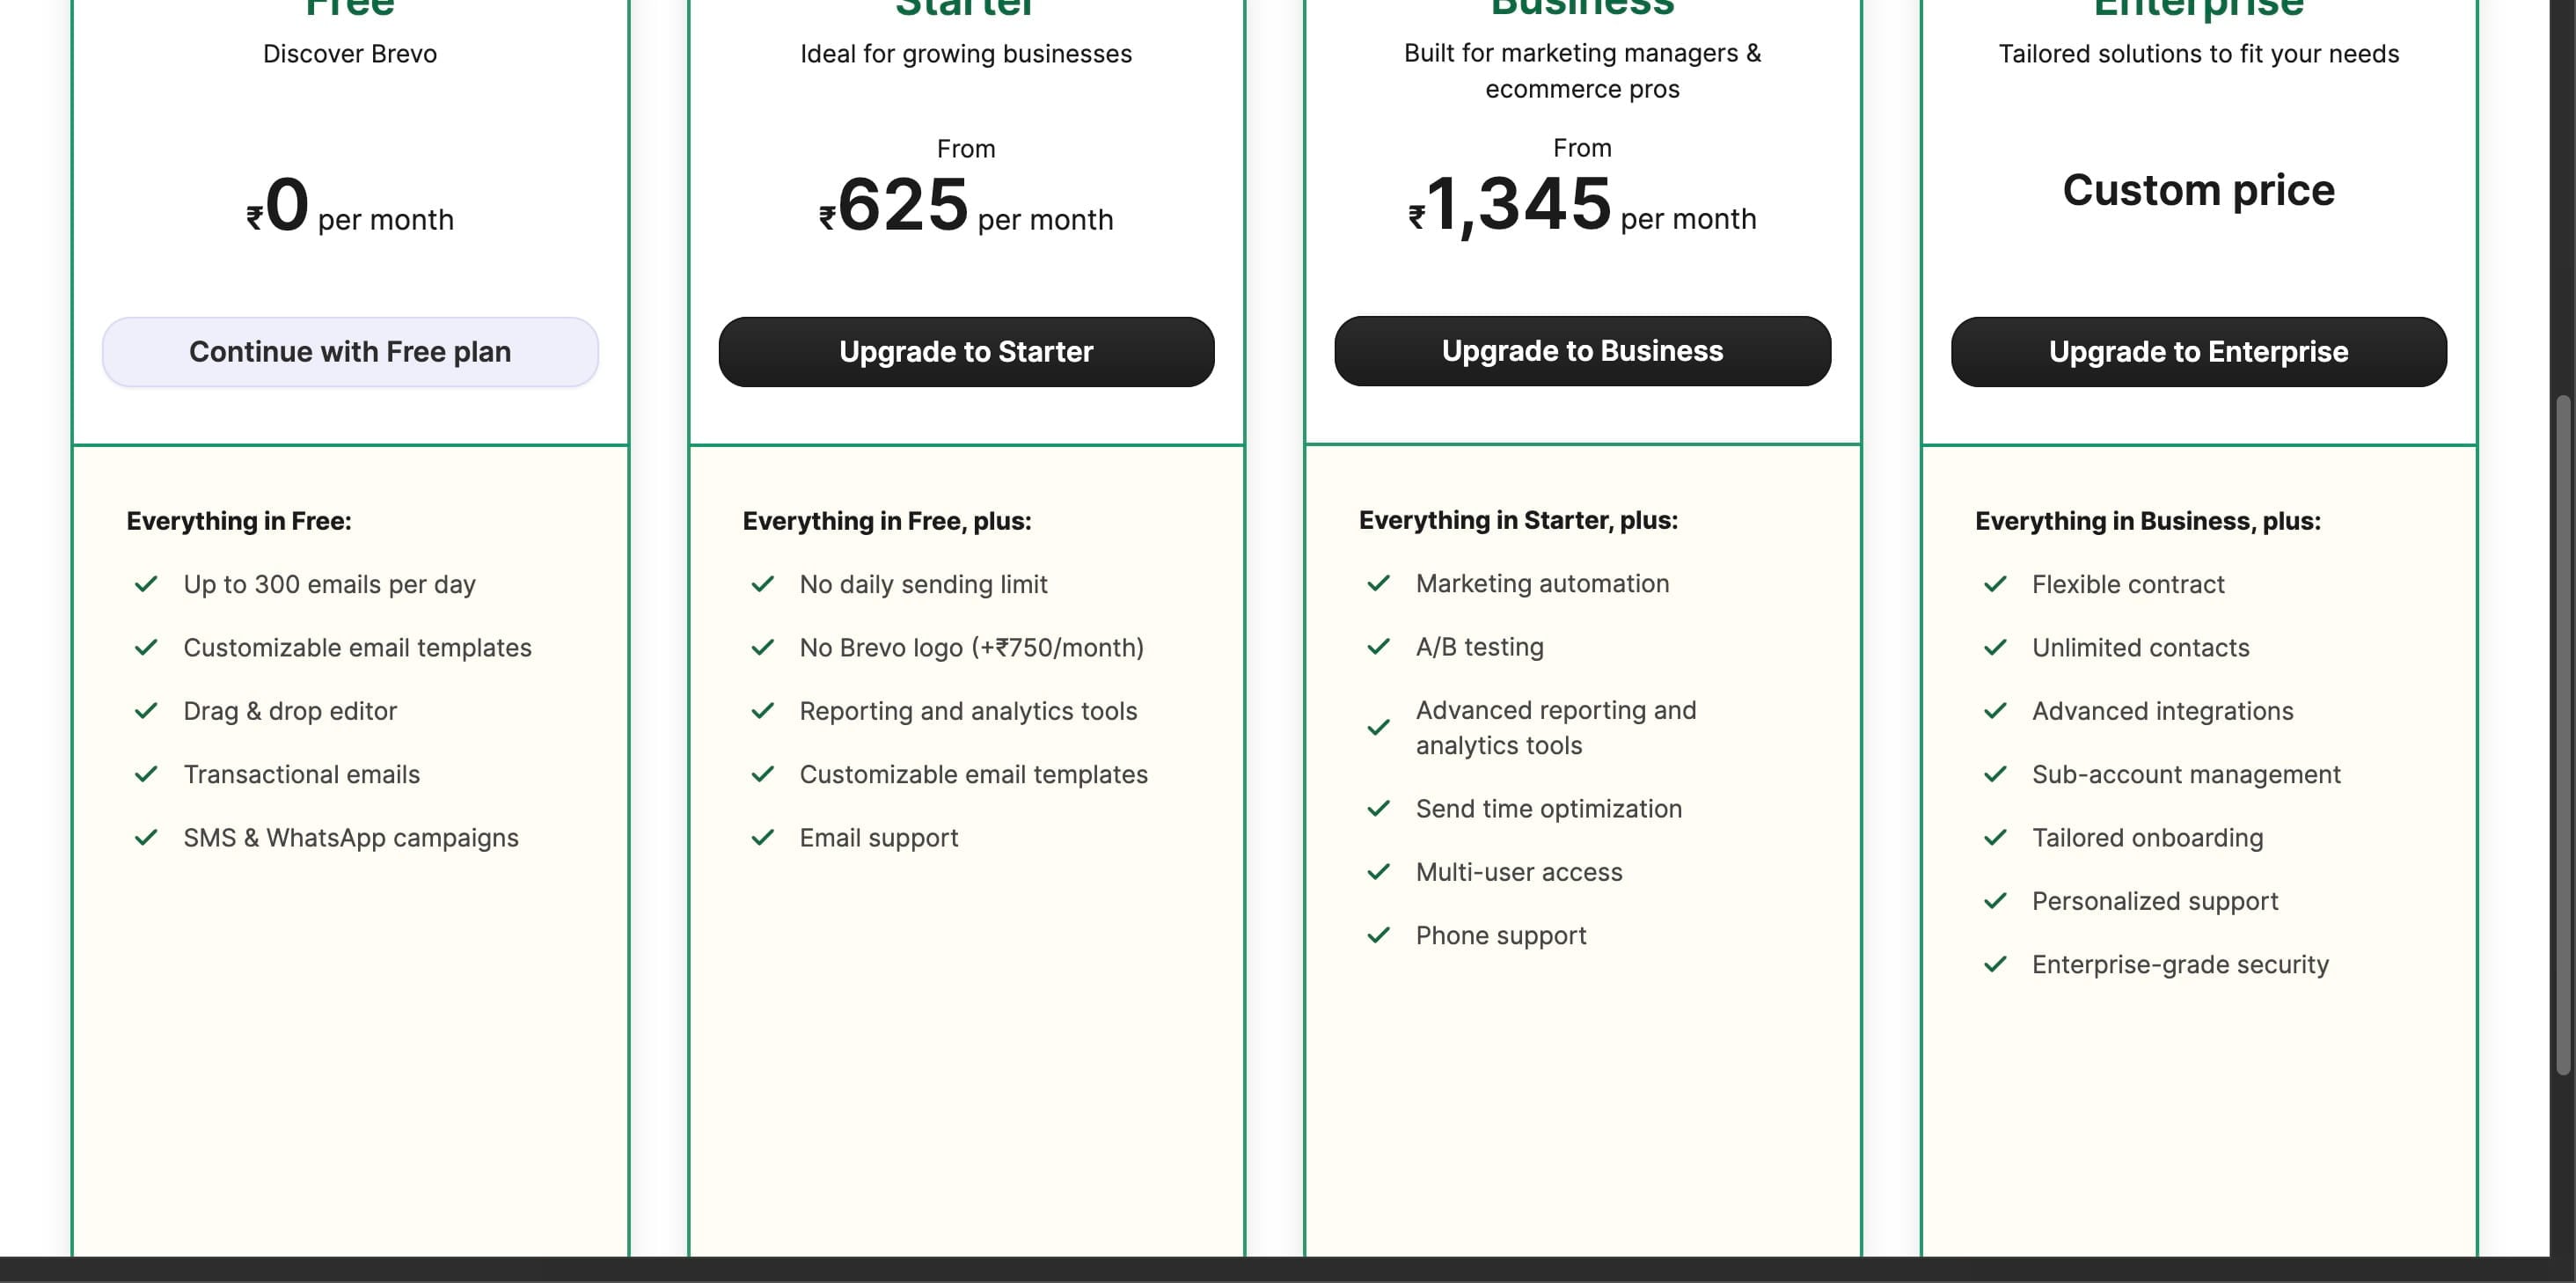
Choose a plan. If you're unsure, start with the FREE plan.
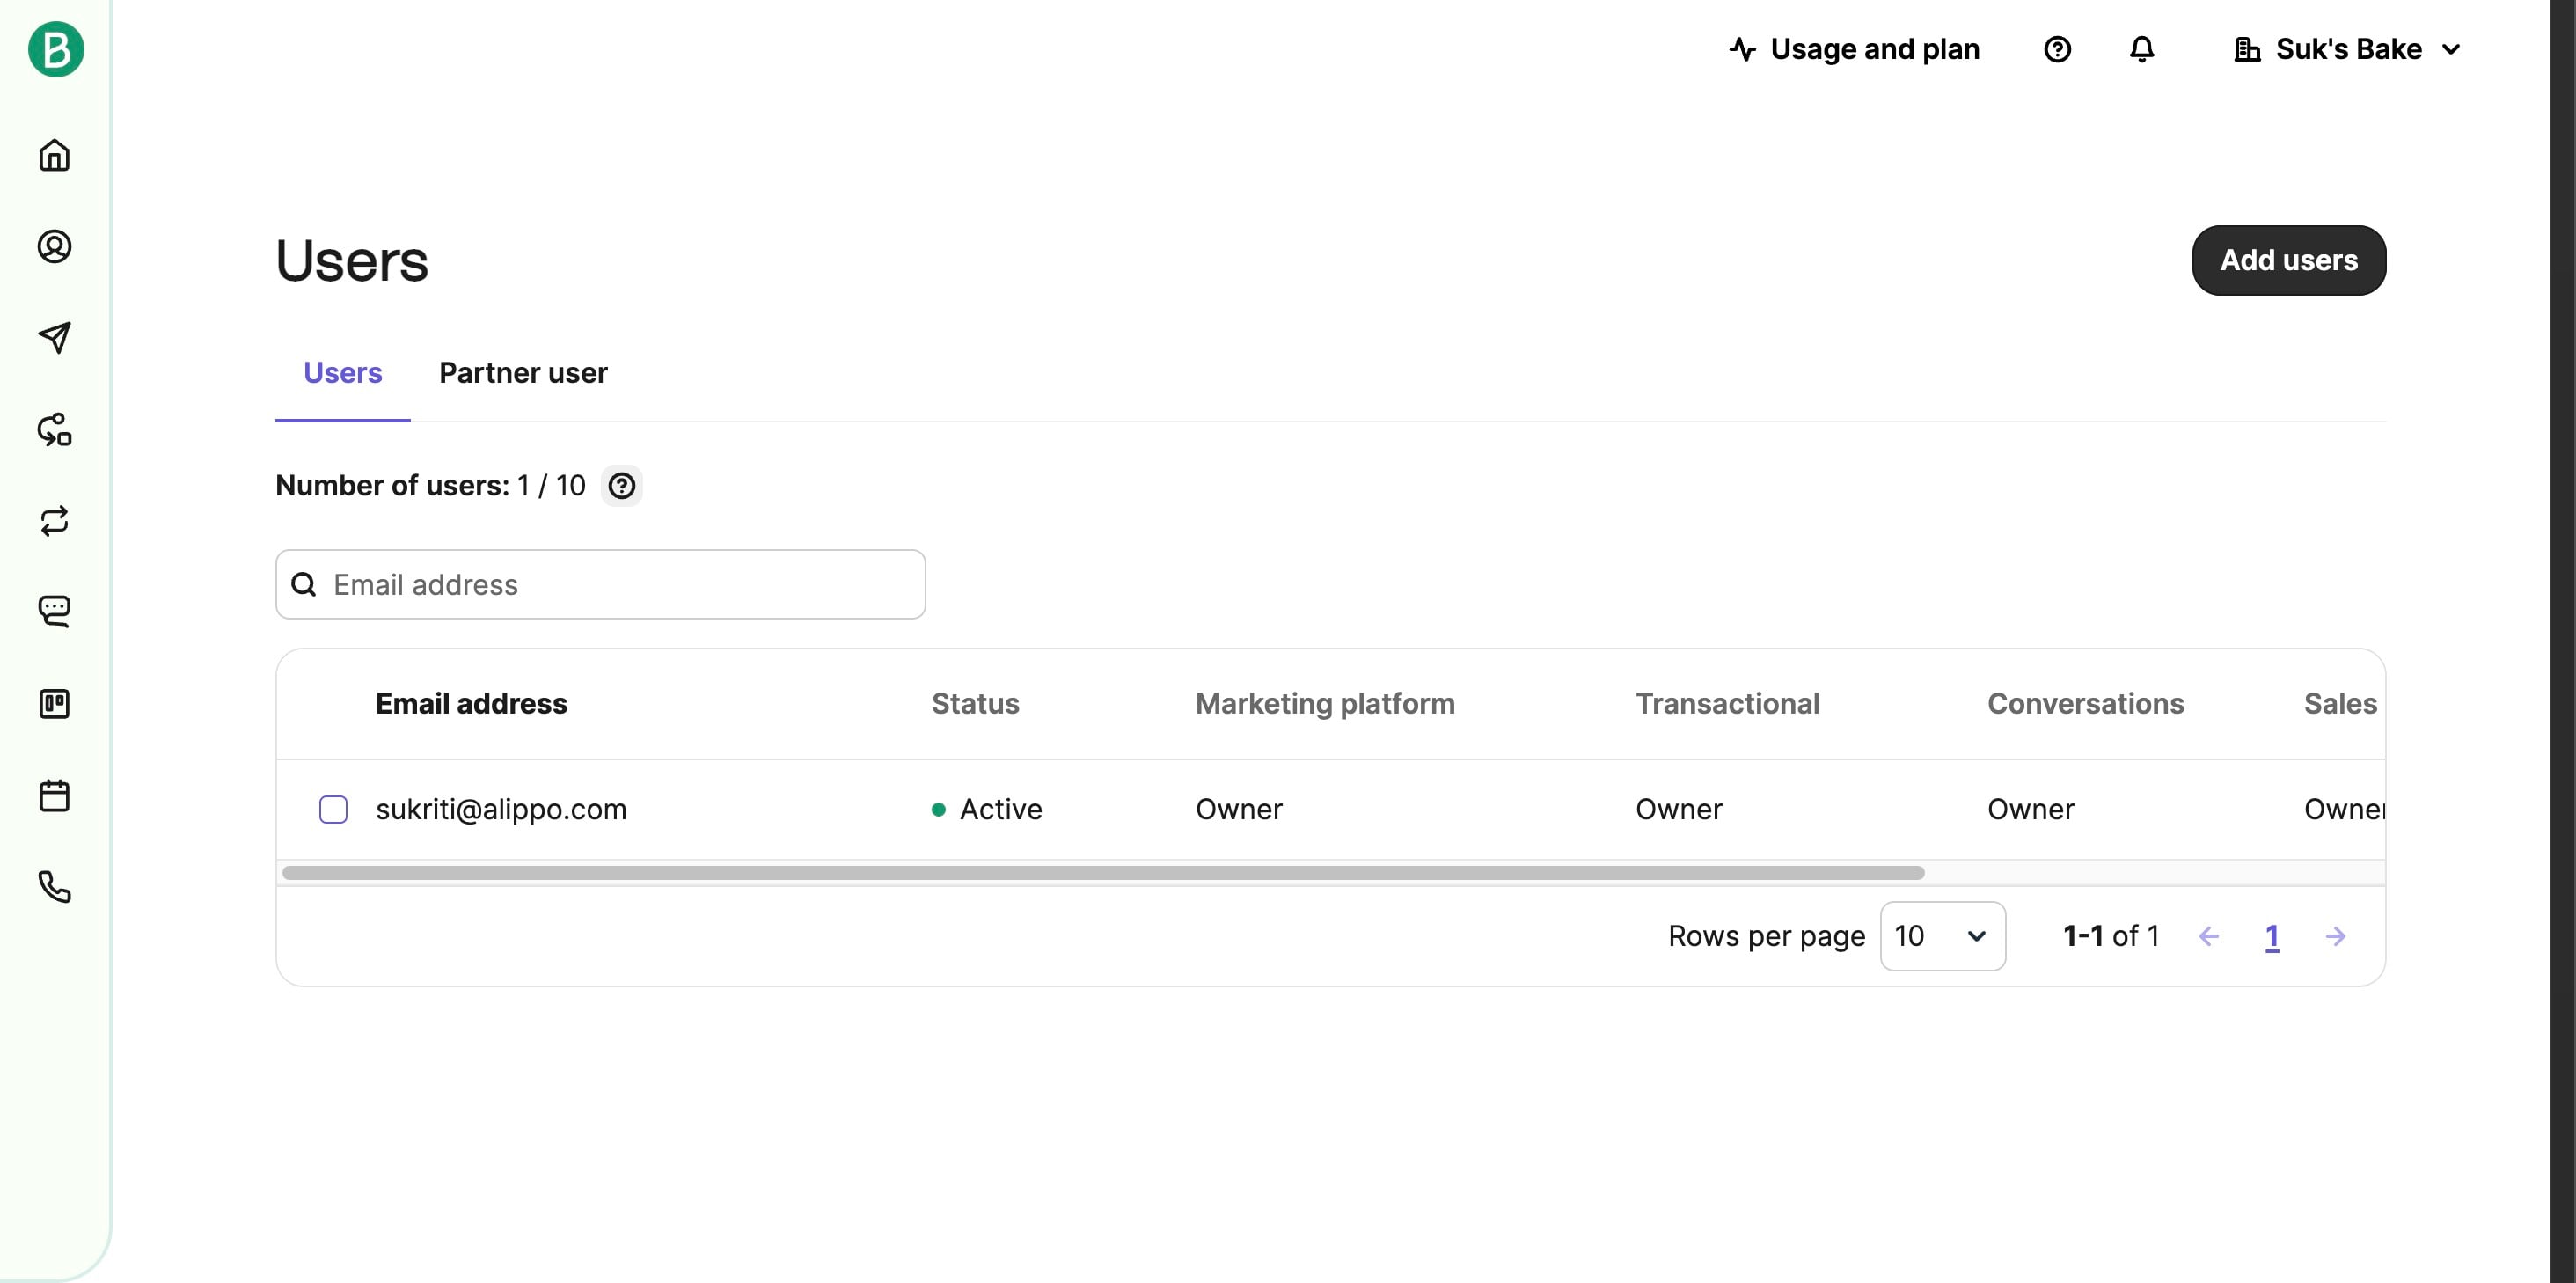
- Invite Prince from Alippo to become a member.
In the Brevo dashboard, click the Users icon in the top-right corner.
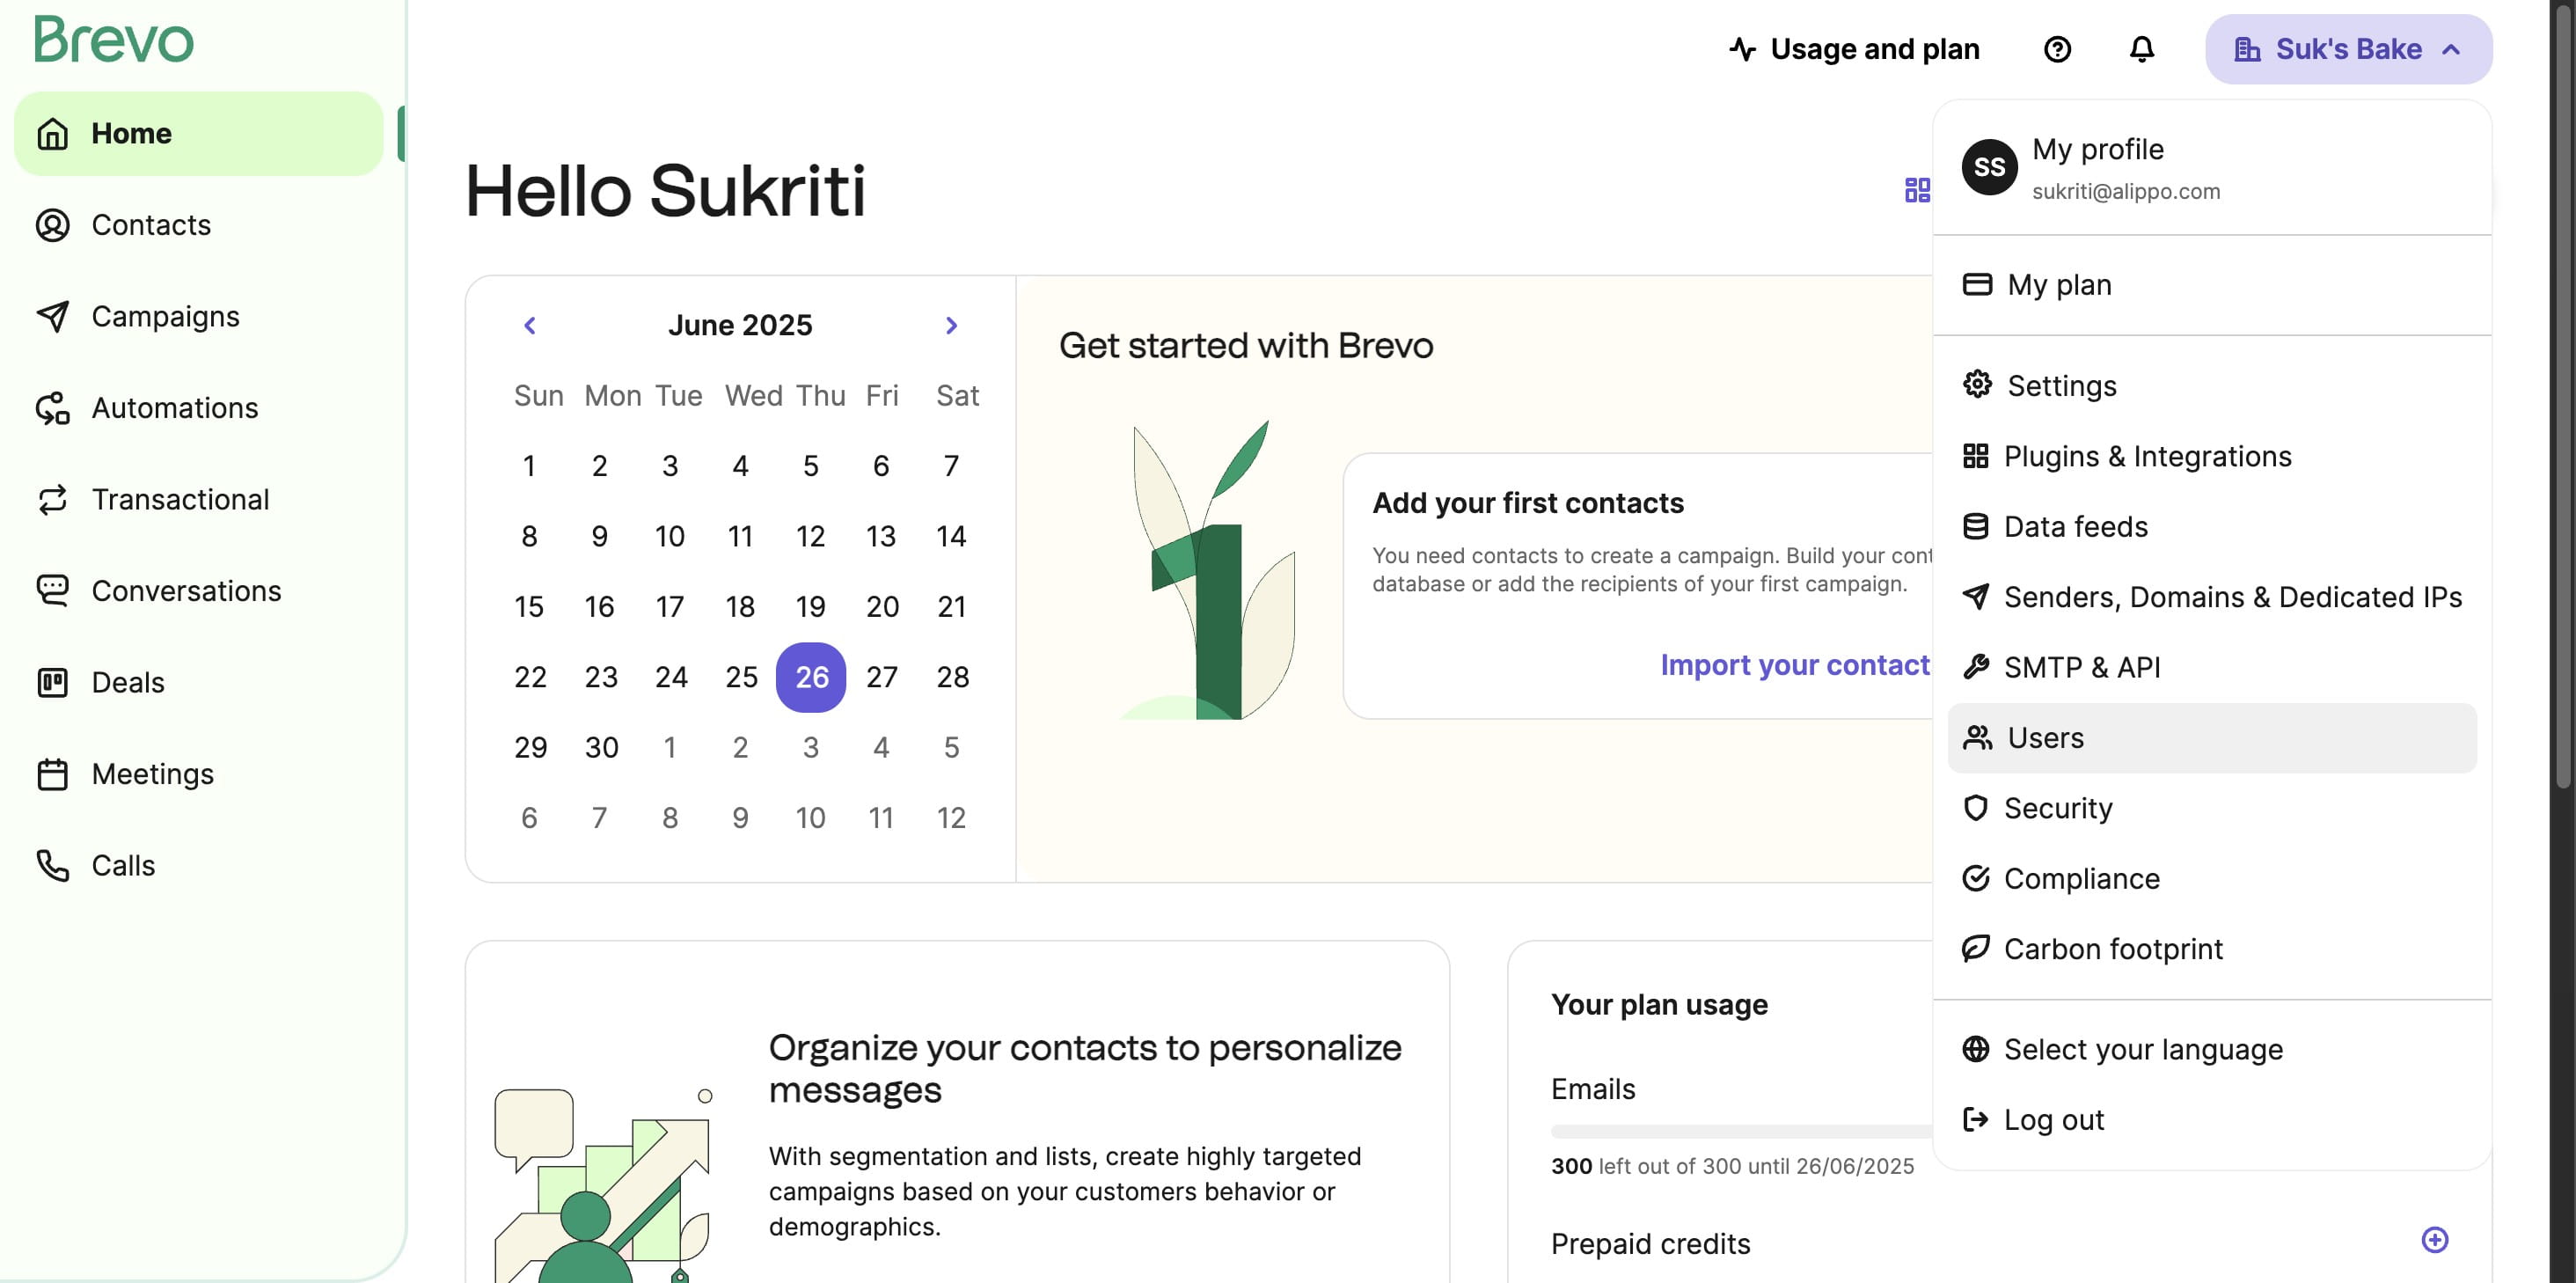
Select Add User on the TOP right corner
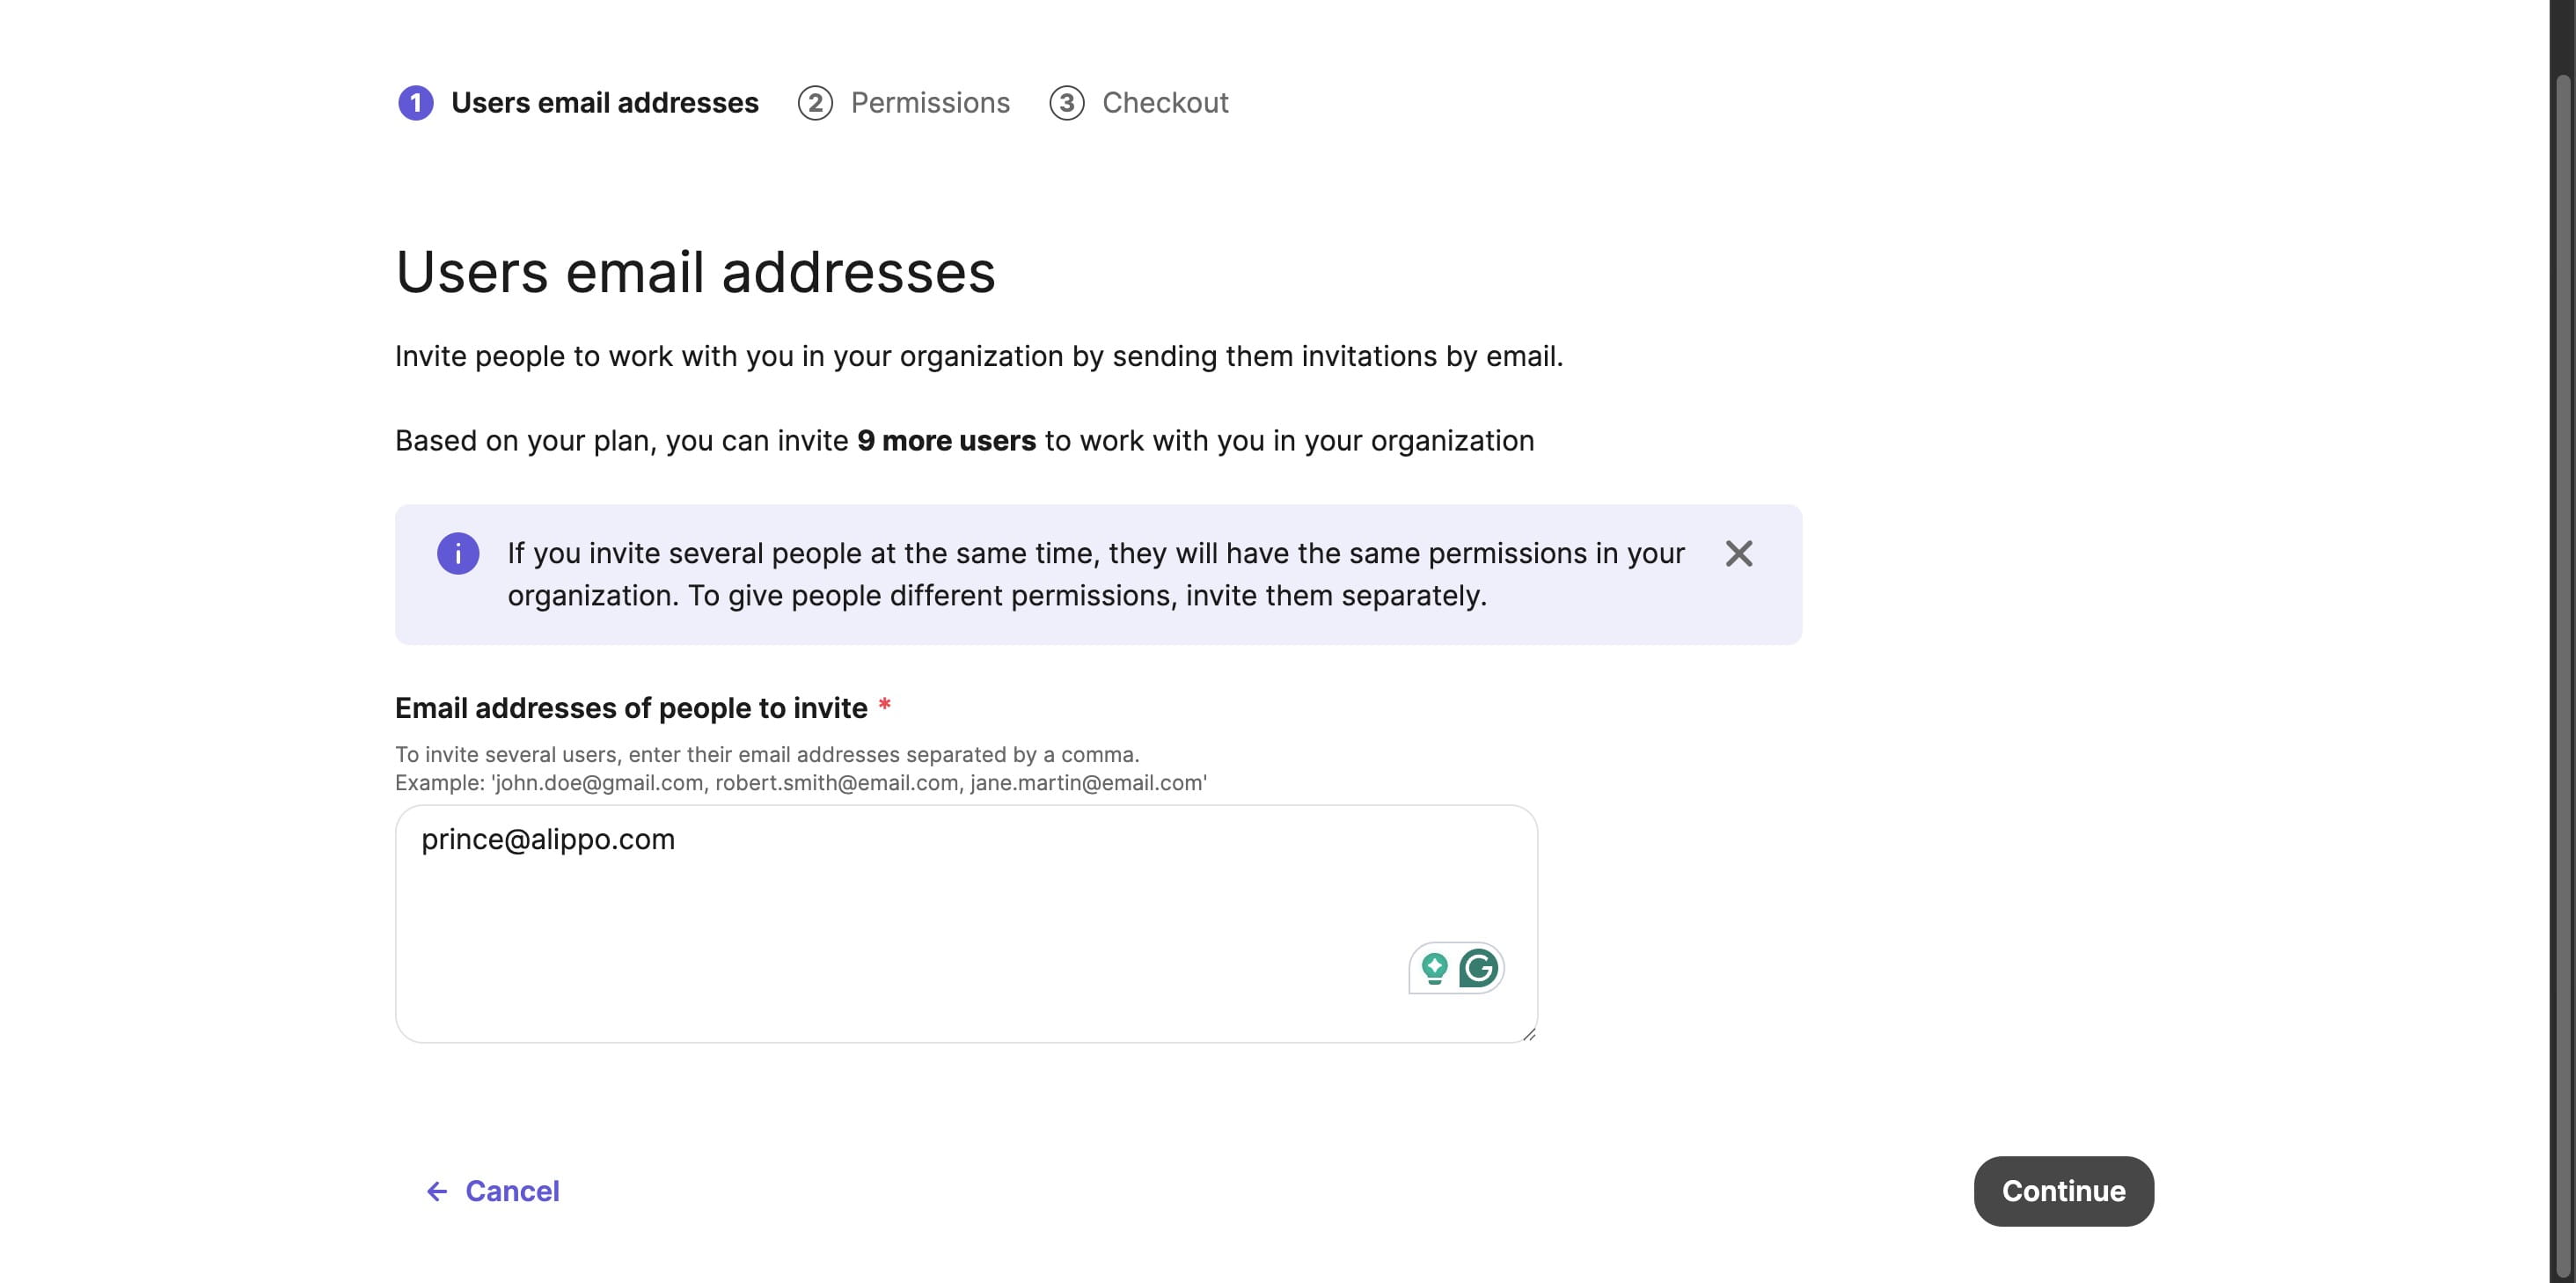
Enter prince@alippo.com in the email field. Then, click "Continue".
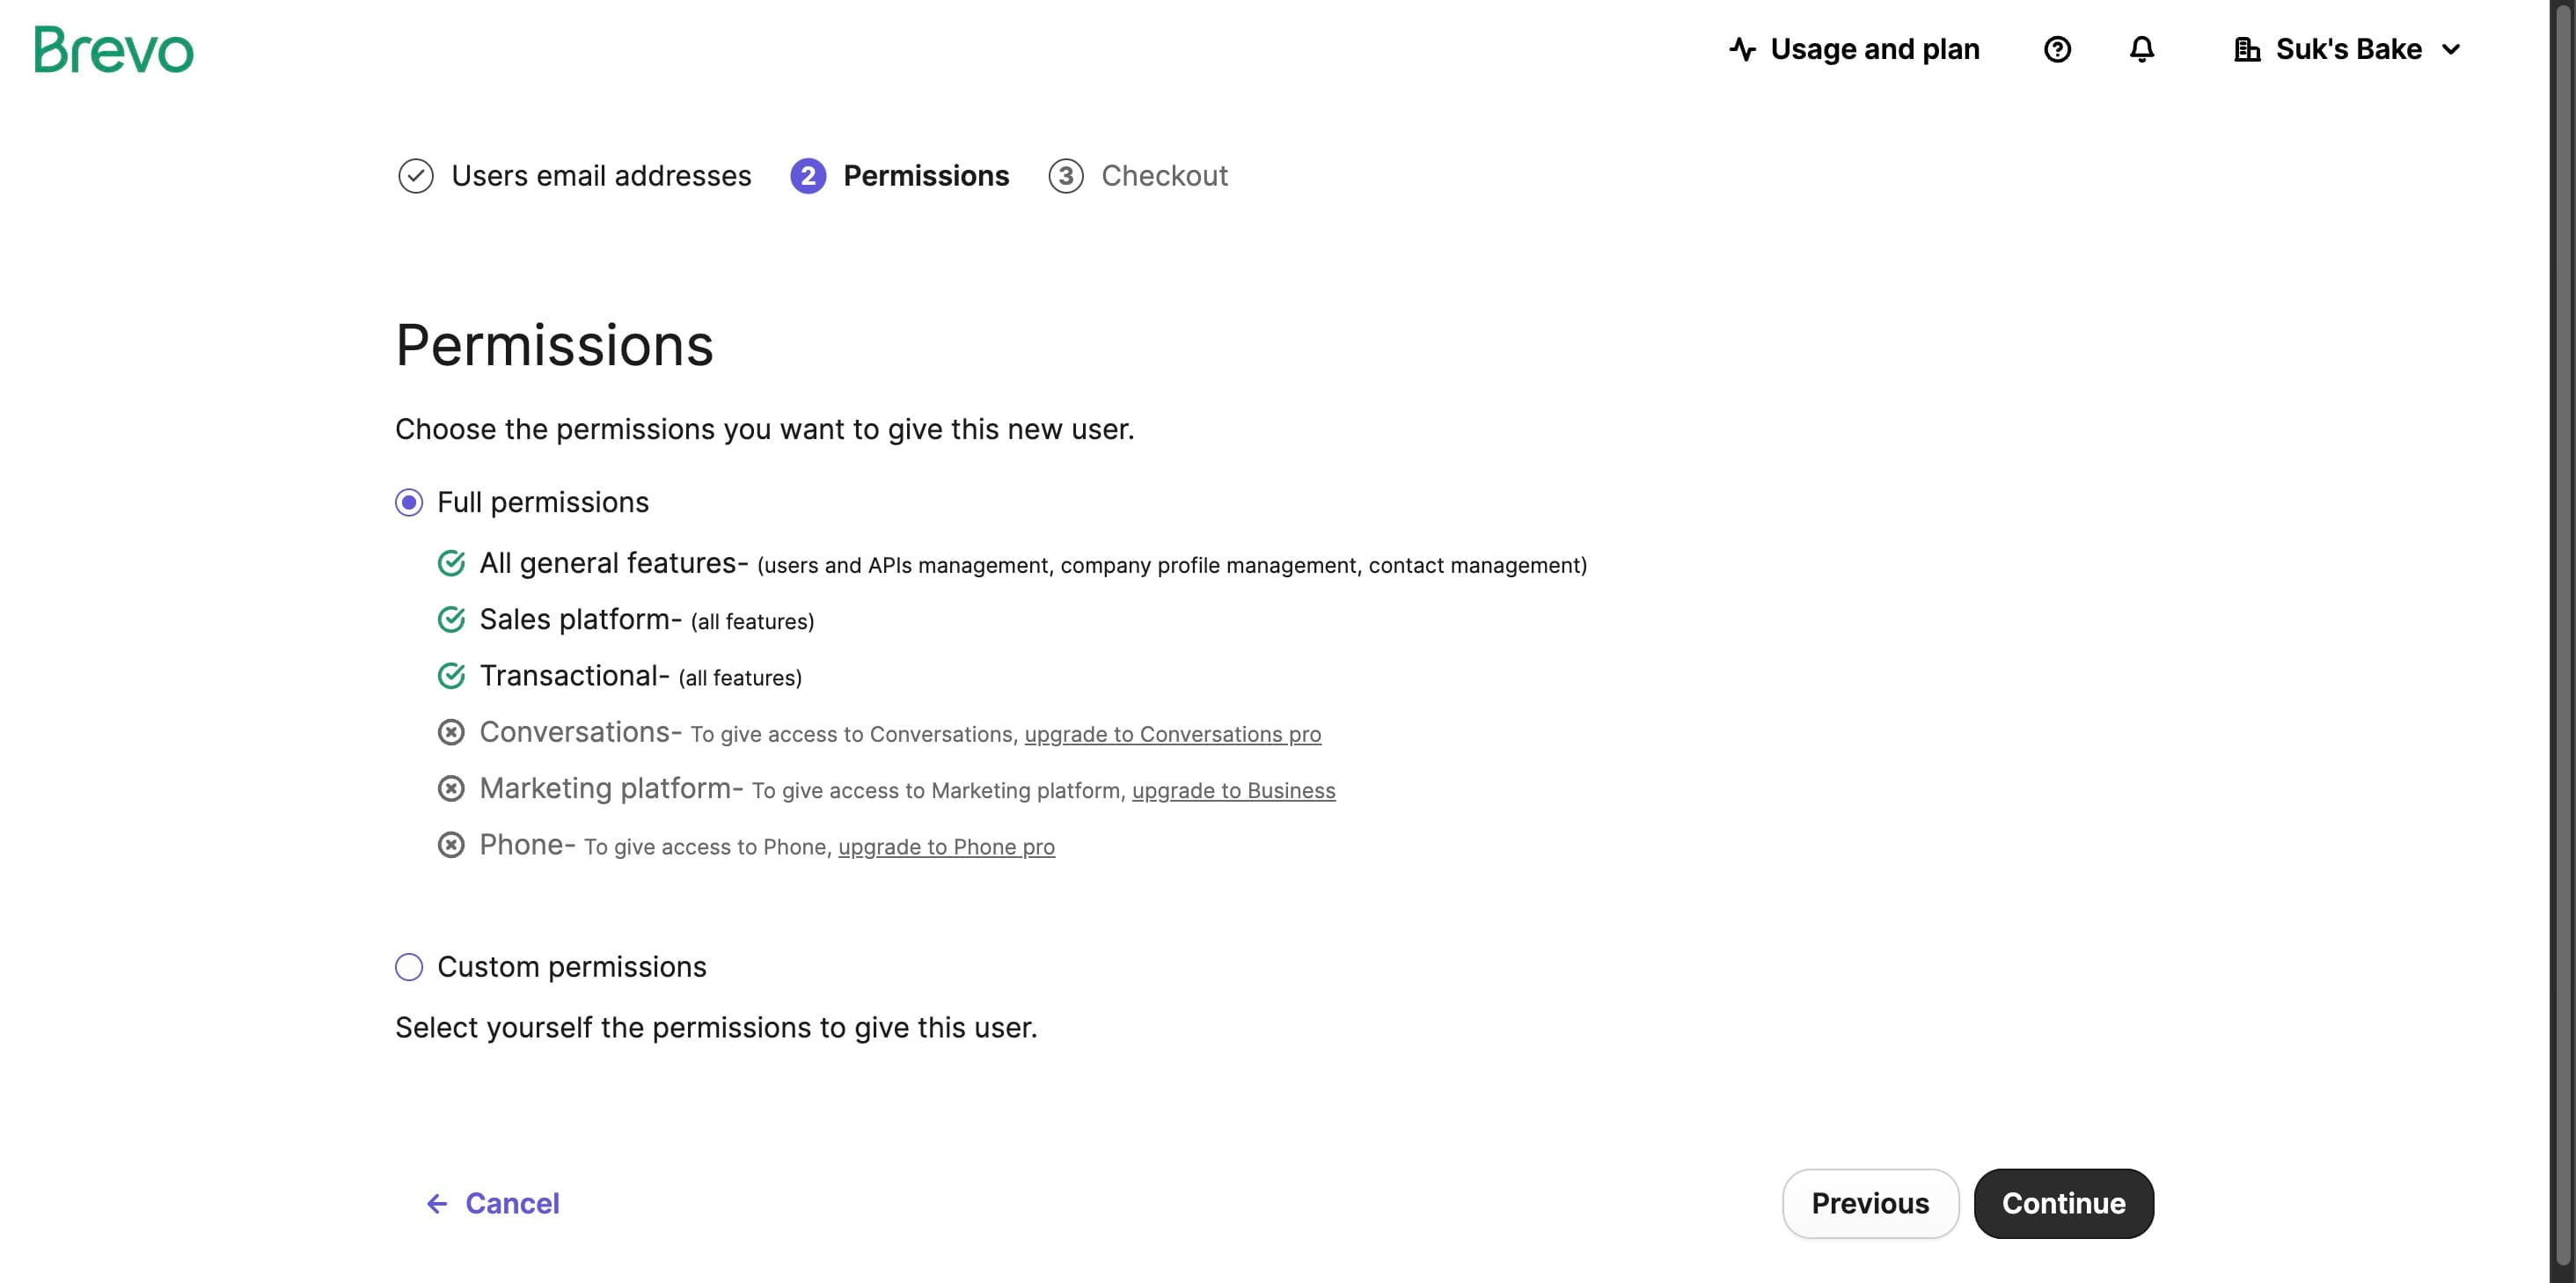
Assign the Administrator role for full access, then click "Continue".
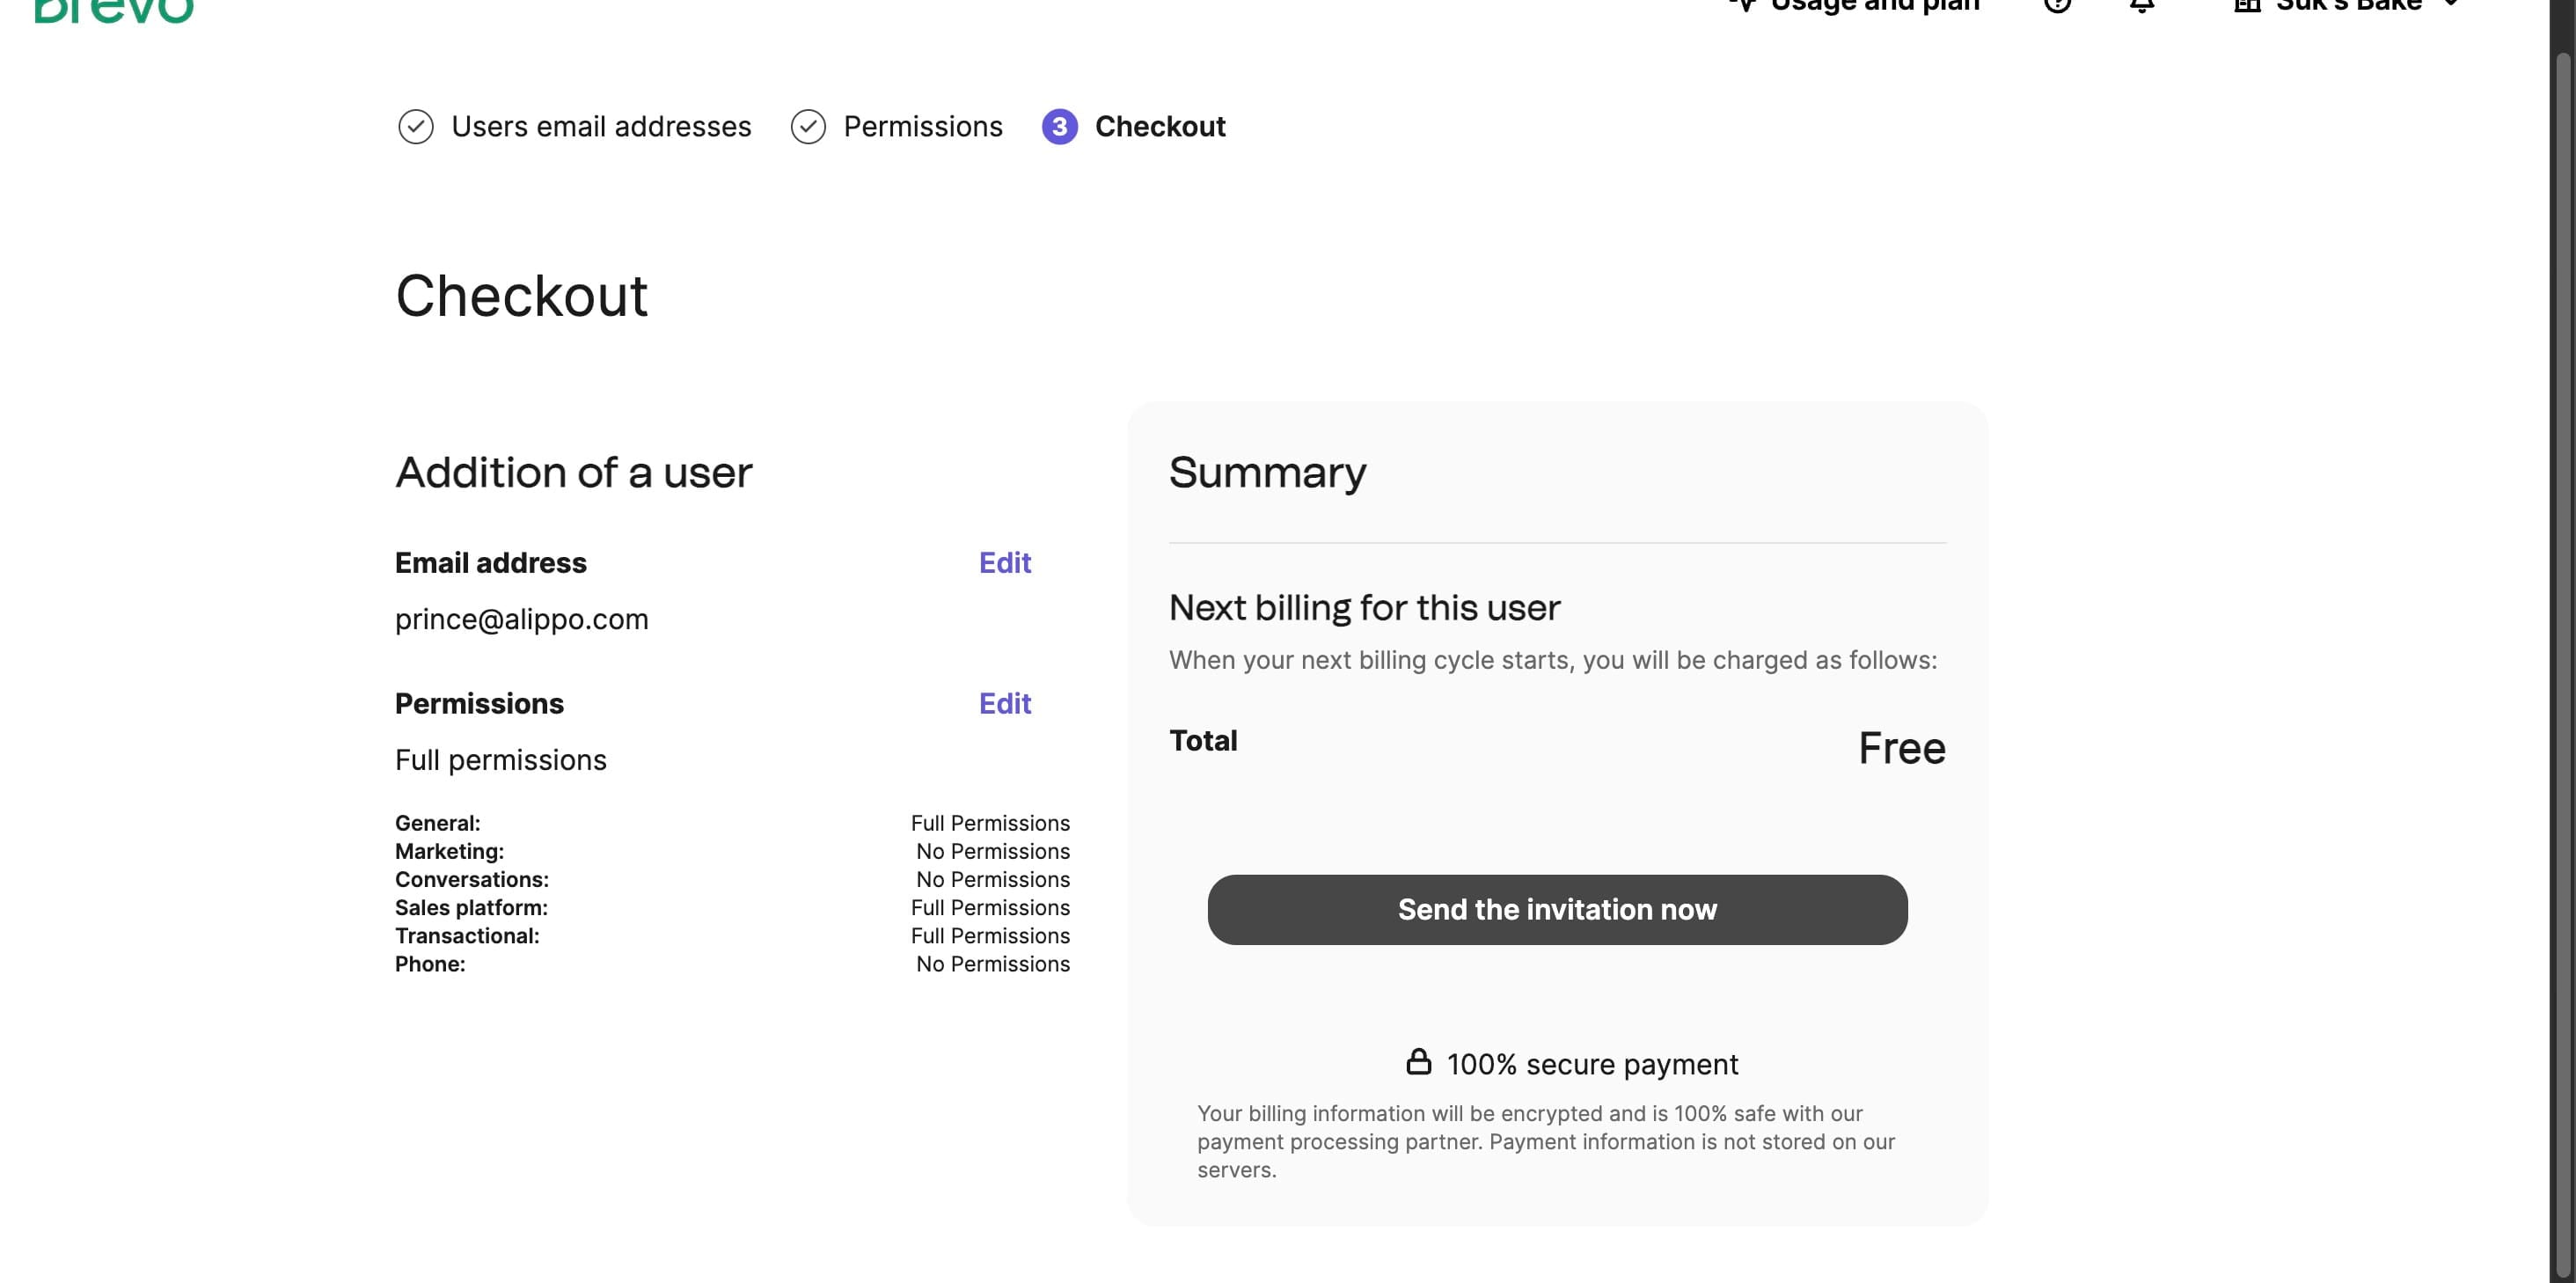
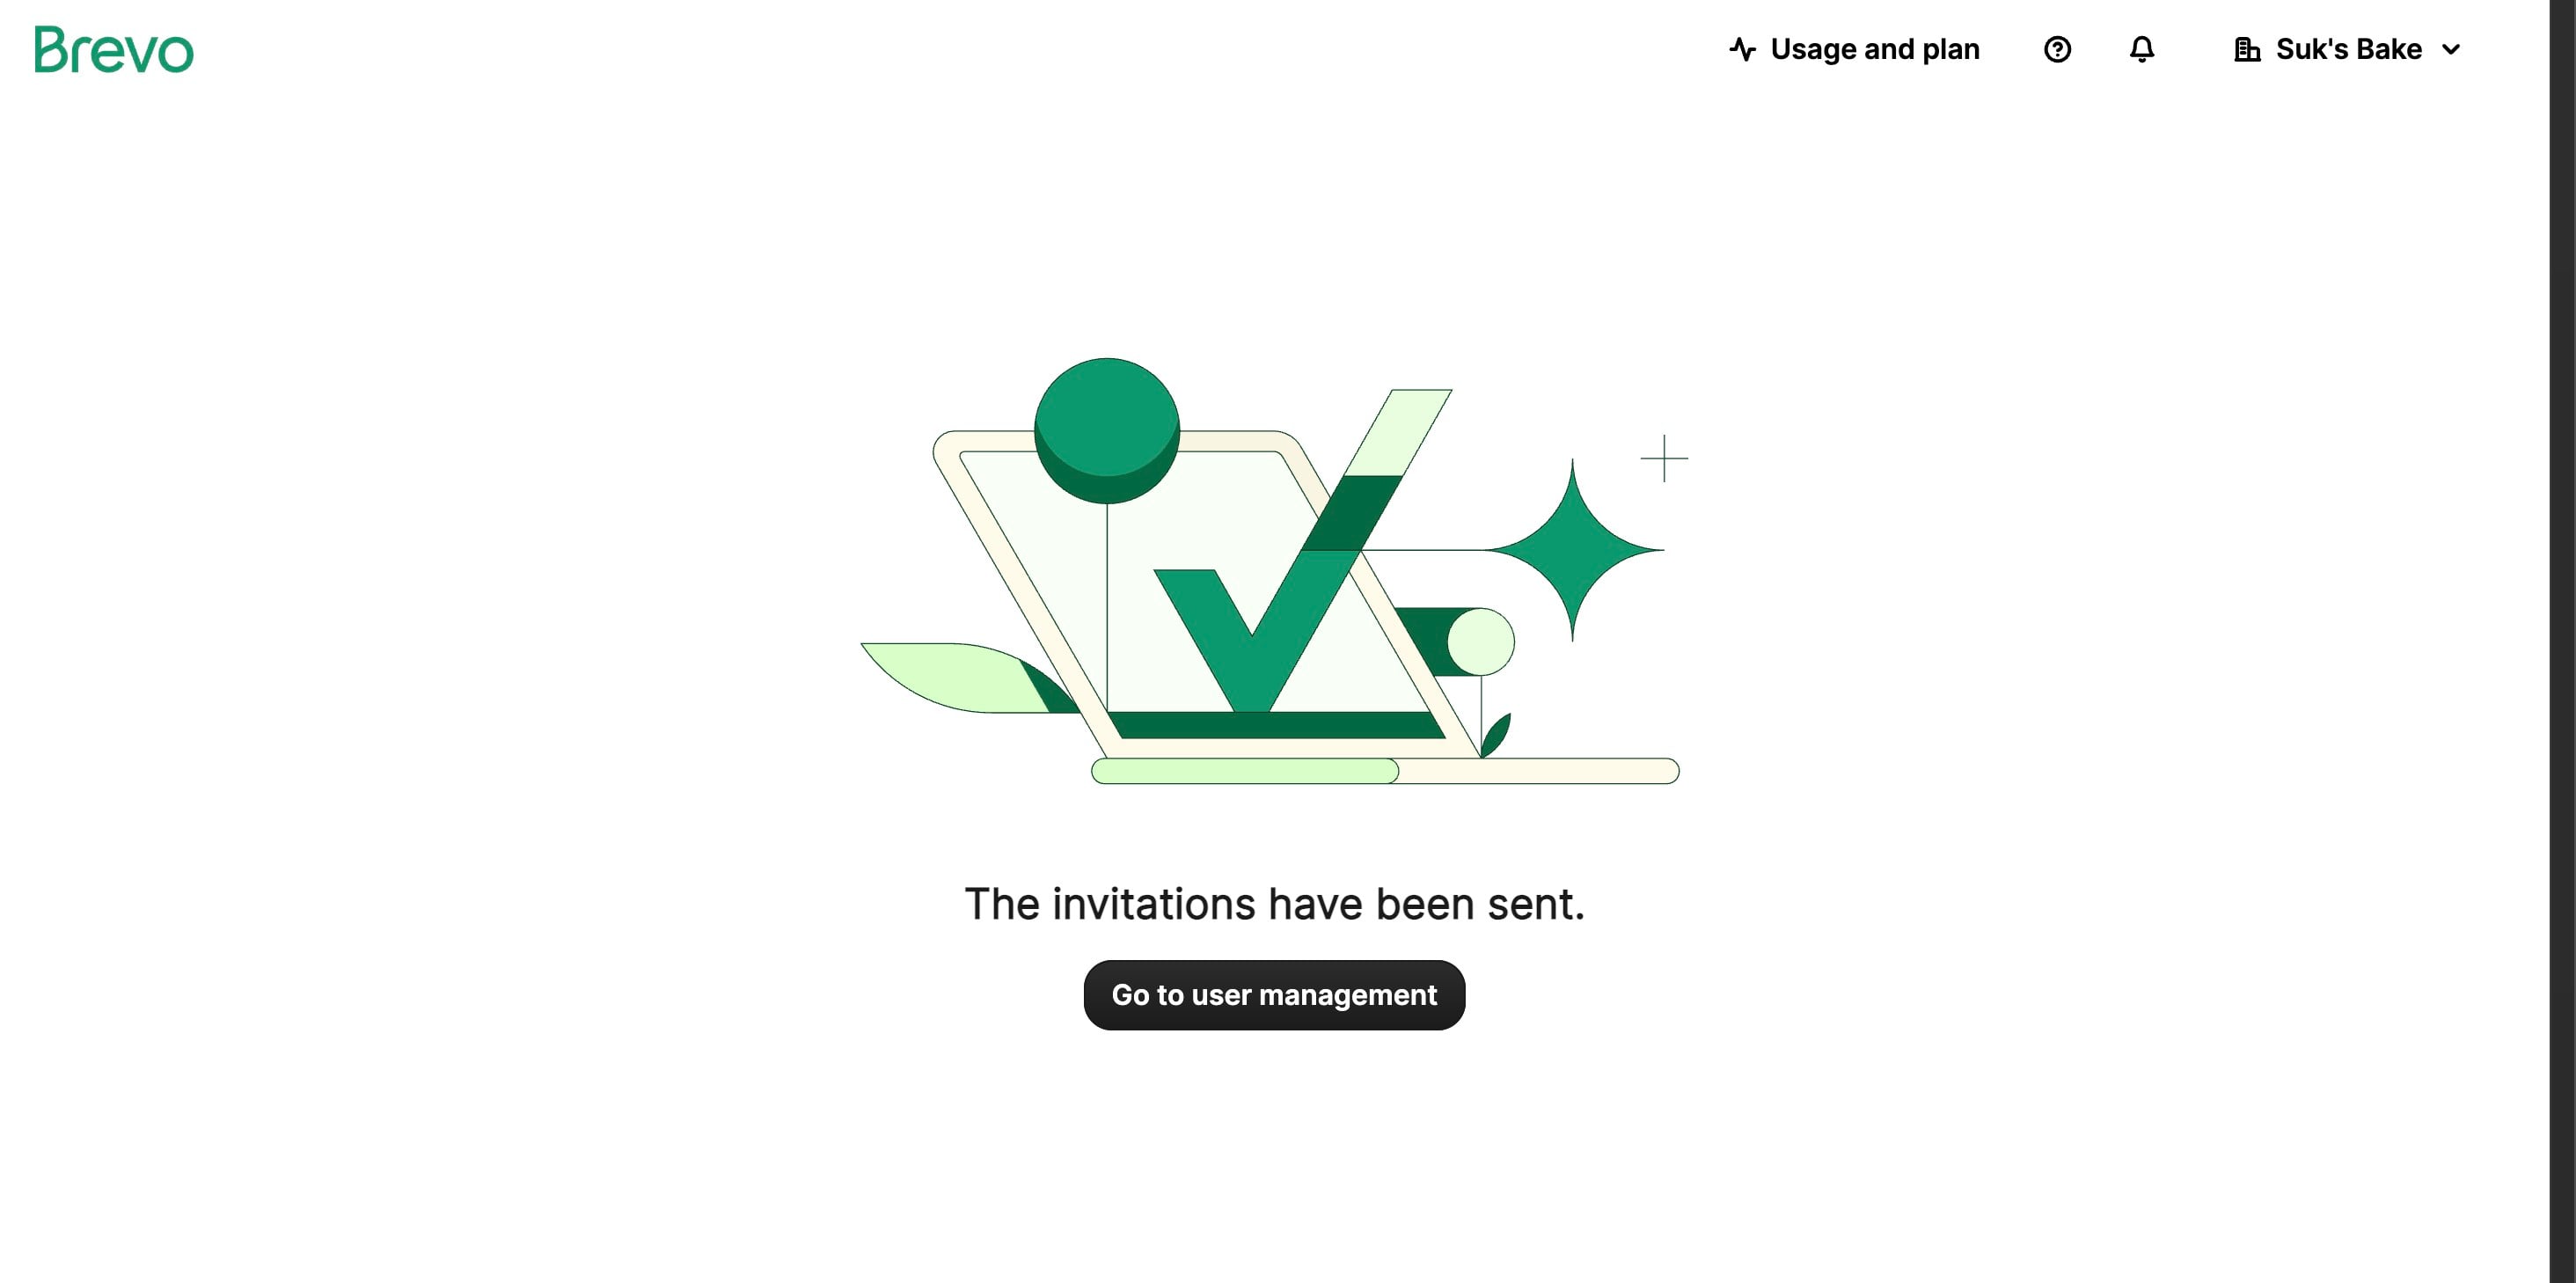
Click Send the Invitation now
Prince will receive an email—once they accept, they’ll have full access.
Done 🚀
Frequently Asked Questions
- How do I create an account with Brevo?
To create an account with Brevo, visit the Brevo sign-up page, click on "Sign up free", and follow the instructions by providing your business email and company details.
- Can I use my personal email for signing up?
For better integration and security, it's recommended to use a business email (e.g., you@yourcompany.com) during the sign-up process, as it’s required for verification and accessing some features.
- What information do I need to complete during onboarding?
After sign-up, you’ll be asked to complete the onboarding wizard where you'll enter your business name, company details, address, and contact information. You’ll also verify your contact number via OTP.
- How do I verify my email address?
After entering your email during sign-up, you will receive a verification link in your inbox. Click on the link to verify your email address and proceed with the next steps.
- Do I need to provide a website URL to use Brevo?
You can start with Test Mode without providing your website. However, if you wish to generate Live Mode API keys for processing payments, you will need to provide your website details during the onboarding process.
- How do I generate API keys in Brevo?
After logging in to your Brevo Dashboard, navigate to Account & Settings → API Keys. From there, you can generate keys for Test Mode or Live Mode based on your integration needs.
- Can I regenerate my API keys?
Yes, if you need to regenerate your API keys, you can do so by navigating to the API Keys section in the Dashboard. OTP verification is required for security purposes during this process.
- How do I add additional users to my Brevo account?
In the Brevo Dashboard, click on the Users icon at the top-right corner, select Add User, and assign roles such as Administrator or Manager for full or limited access.